On this page you can find specifics about minimum requirements for using DocFinance Connector:
DocFinance min version 8.5.0a
Passaggi principali| On Prem | SaaS |
| Verify you have a service with NavUserPassword authentication and that the APIs are enabled | Contact IT service for the creation of an "App registration" |
| Install the app | Install the app |
| Enter the DocFinance setup in the app | Enter the DocFinance setup in the app |
| Create the user for the integration with DocFinance create the web access key | Create the user for the integration with DocFinance create the web access key |
| Connection setup on DocFinance to the service in NavUserPassword | Connection setup on DocFinance |
Do I have to publish web services? |
|---|
| No, the app to communicate with DocFinance uses API-type pages, consequently they are automatically exposed by BC, it is not necessary to create the web service |
onPrem Installation
for onPrem installation minimum requirements are::
Credential Type: NavUserPassword
Enable API Services: true
Max Page Size: a scelta (default: 20'000)
Port: to choose (default: 7048)


| Environment Name | name of the environment |
| API publisher/group/version | string used to compose the URL to be called (in case of change in the future, the new URL can be easily obtained) |
| Company ID | ID of the company on BC, it can also be obtained through a lookup on the list of companies |
SaaS Installation
The procedure is:
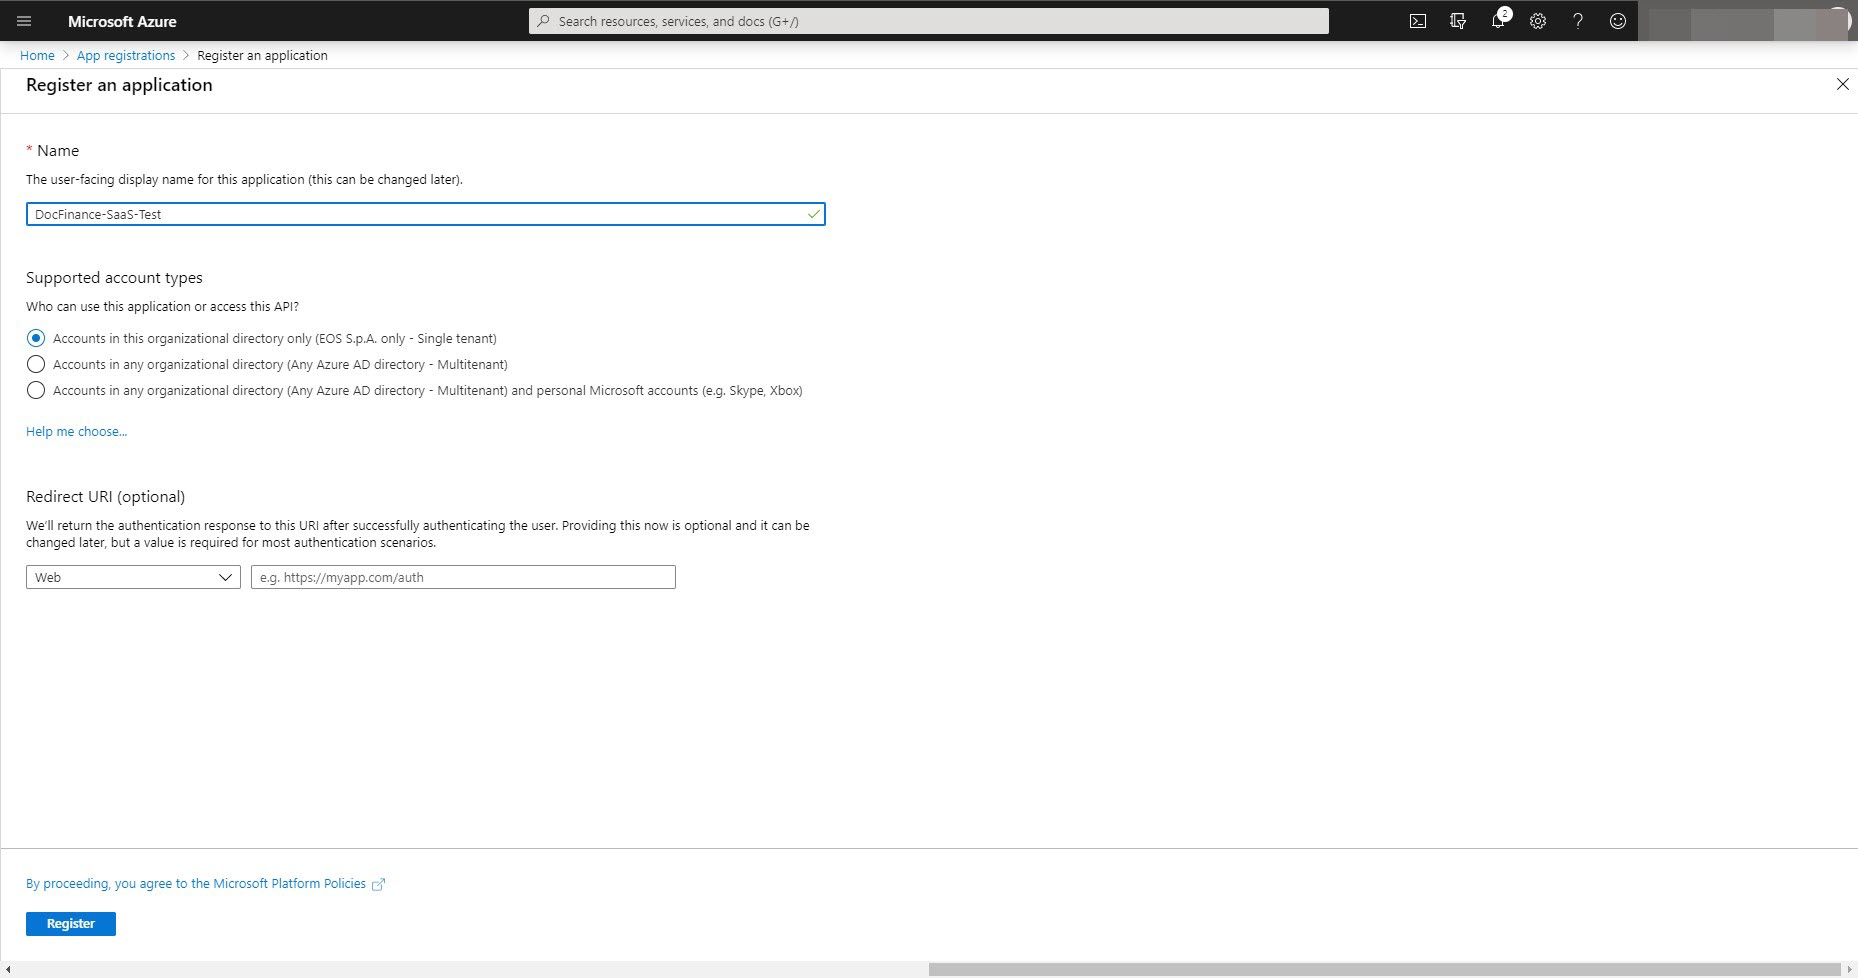
1. Search app registrations and select “New registration”

2. Insert the name and press "Register"
3.On the page Authentication, choose “Add a platform”, select “Mobile and deskop applications”
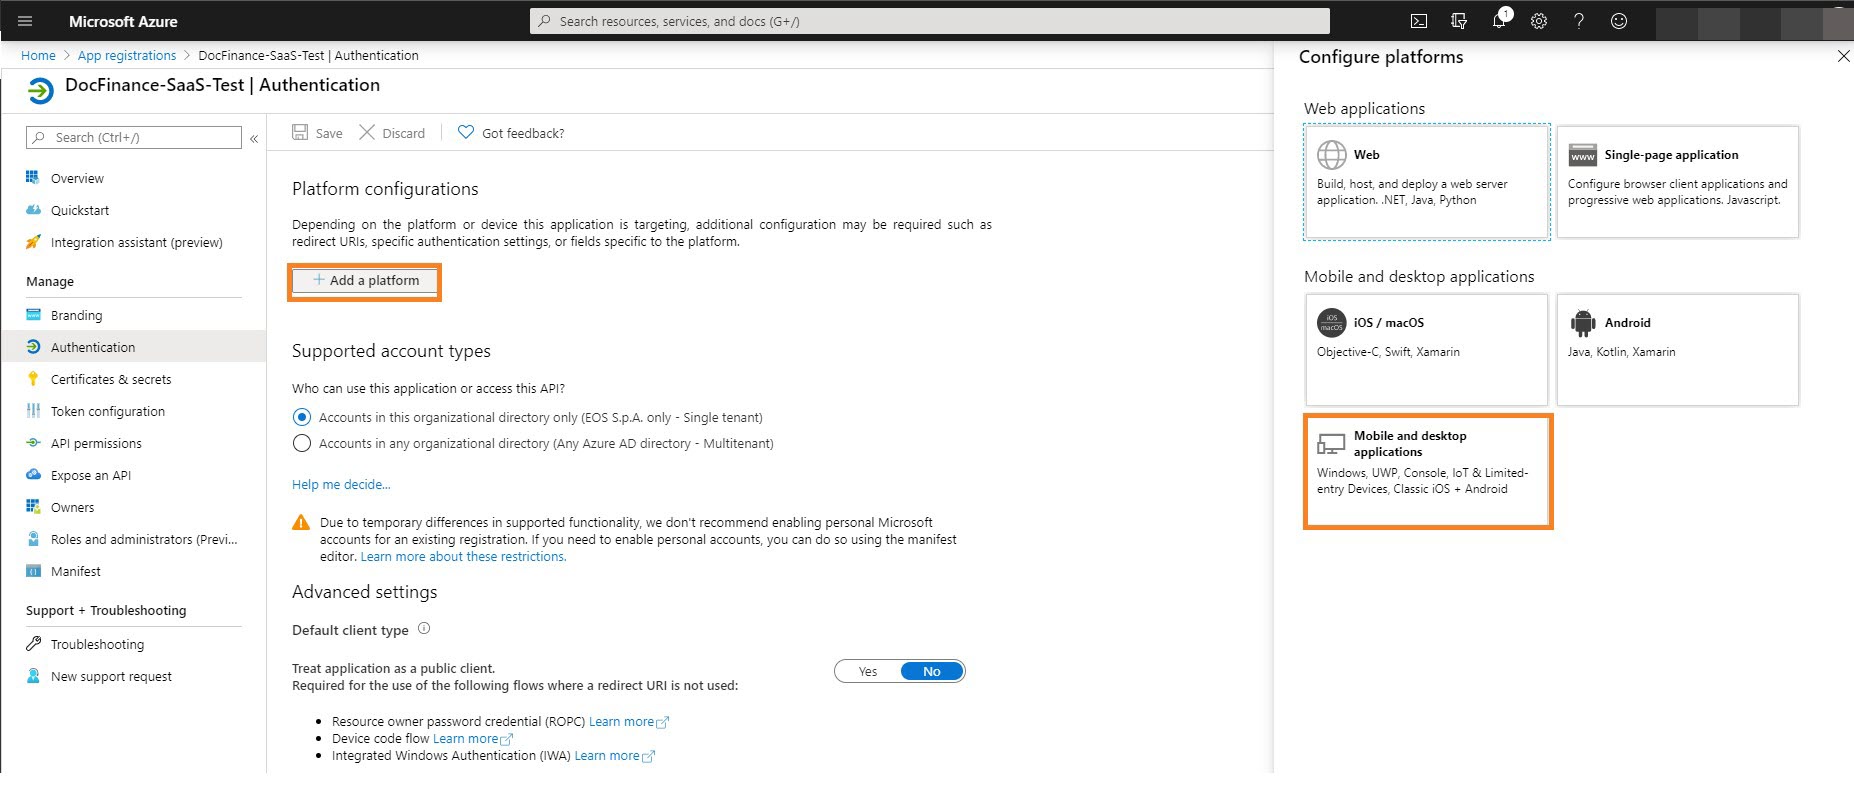
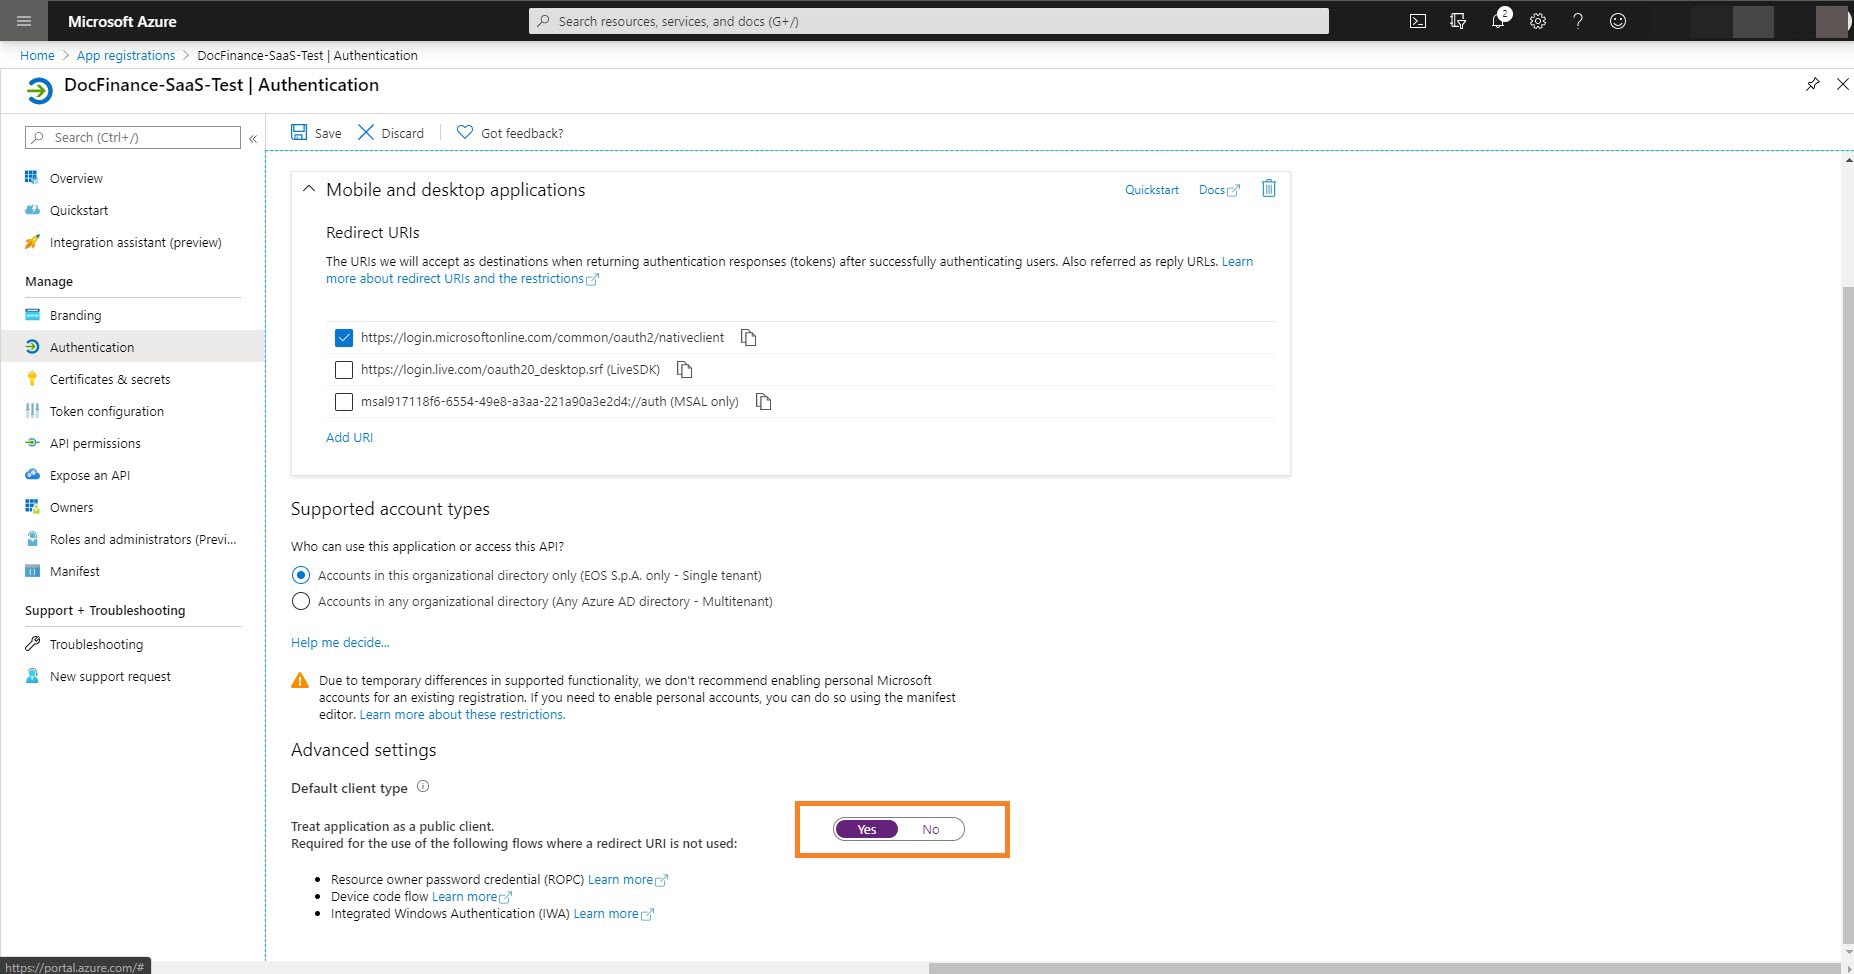
4. Select the first redirect URL and press “configure”

5. Modify the “Default client type” value to "yes"
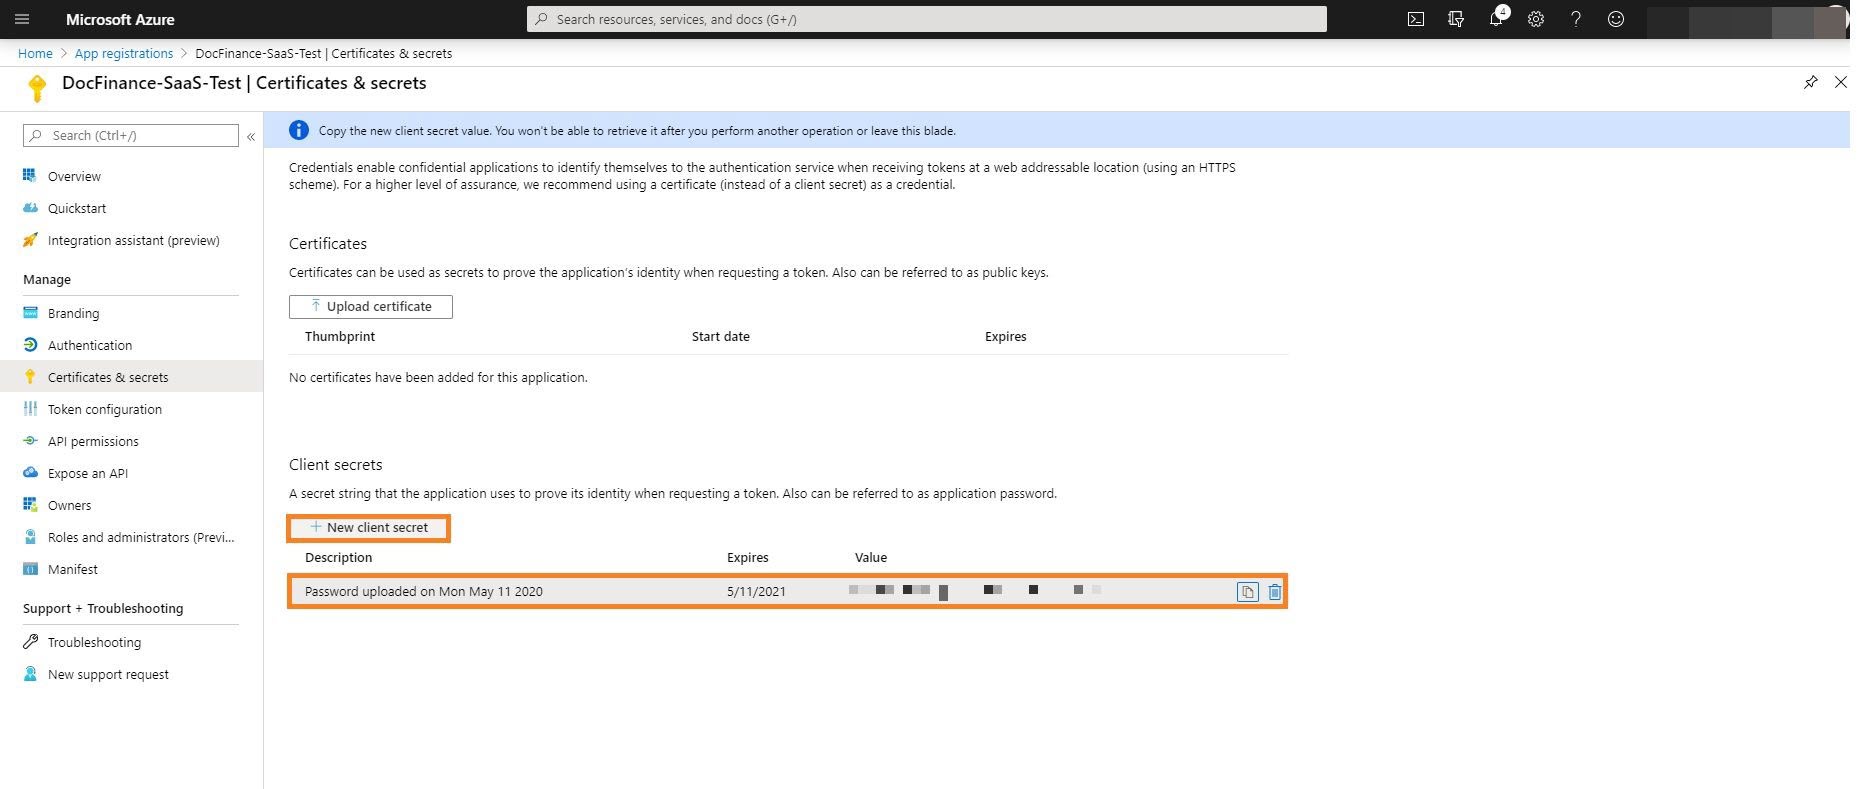
6. On the page “Certificates & secrets” create a new Client secret using the specific action and save. Afterwords the action will not be visible. It is recommended to do it now.
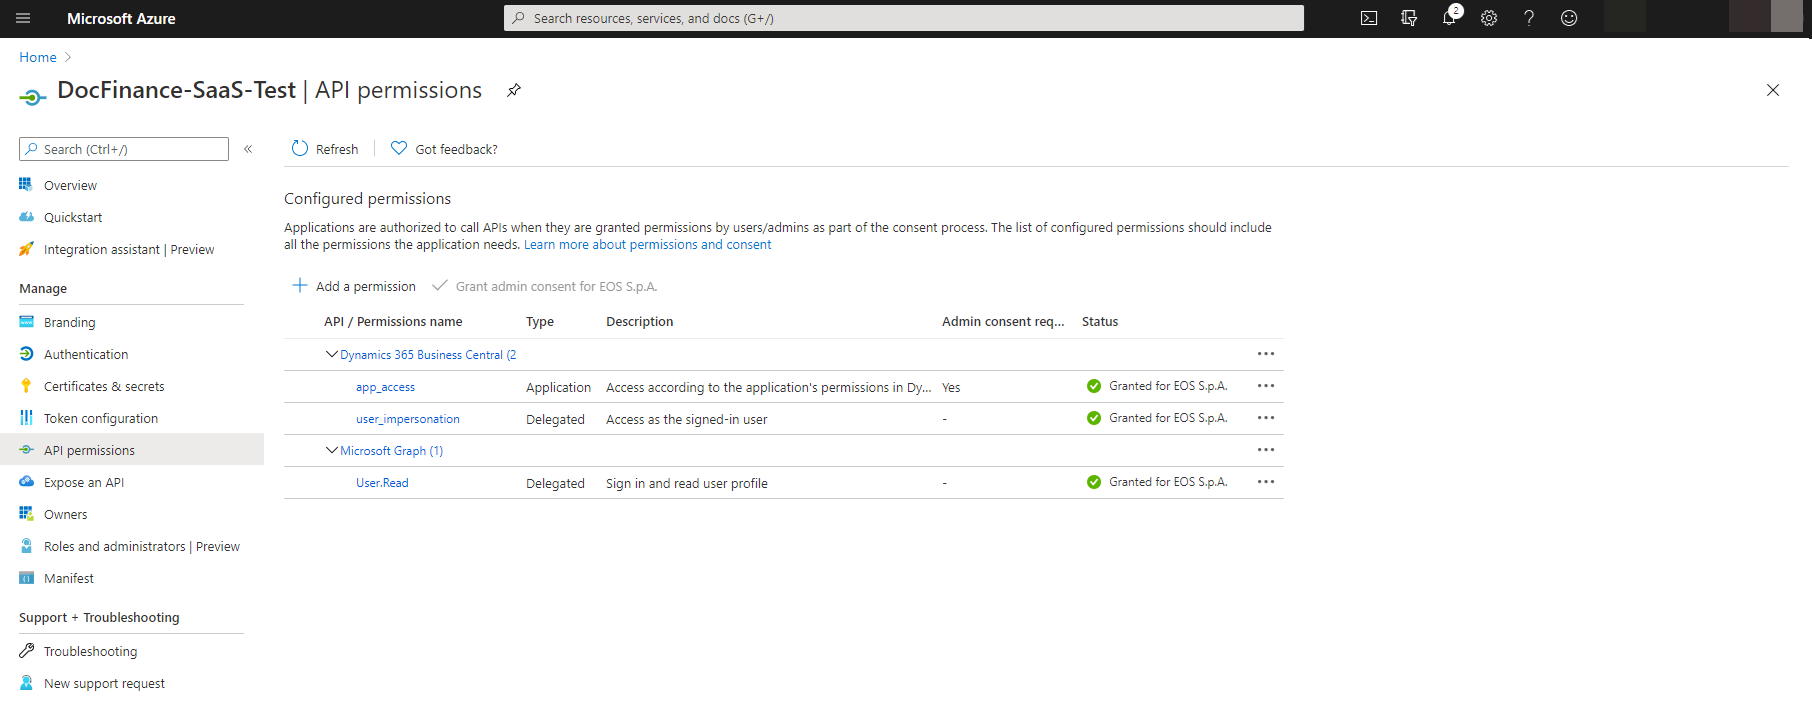
7. On the page “API Permission”, select “Add a permission” and then “Dynamics 365 Business Central”
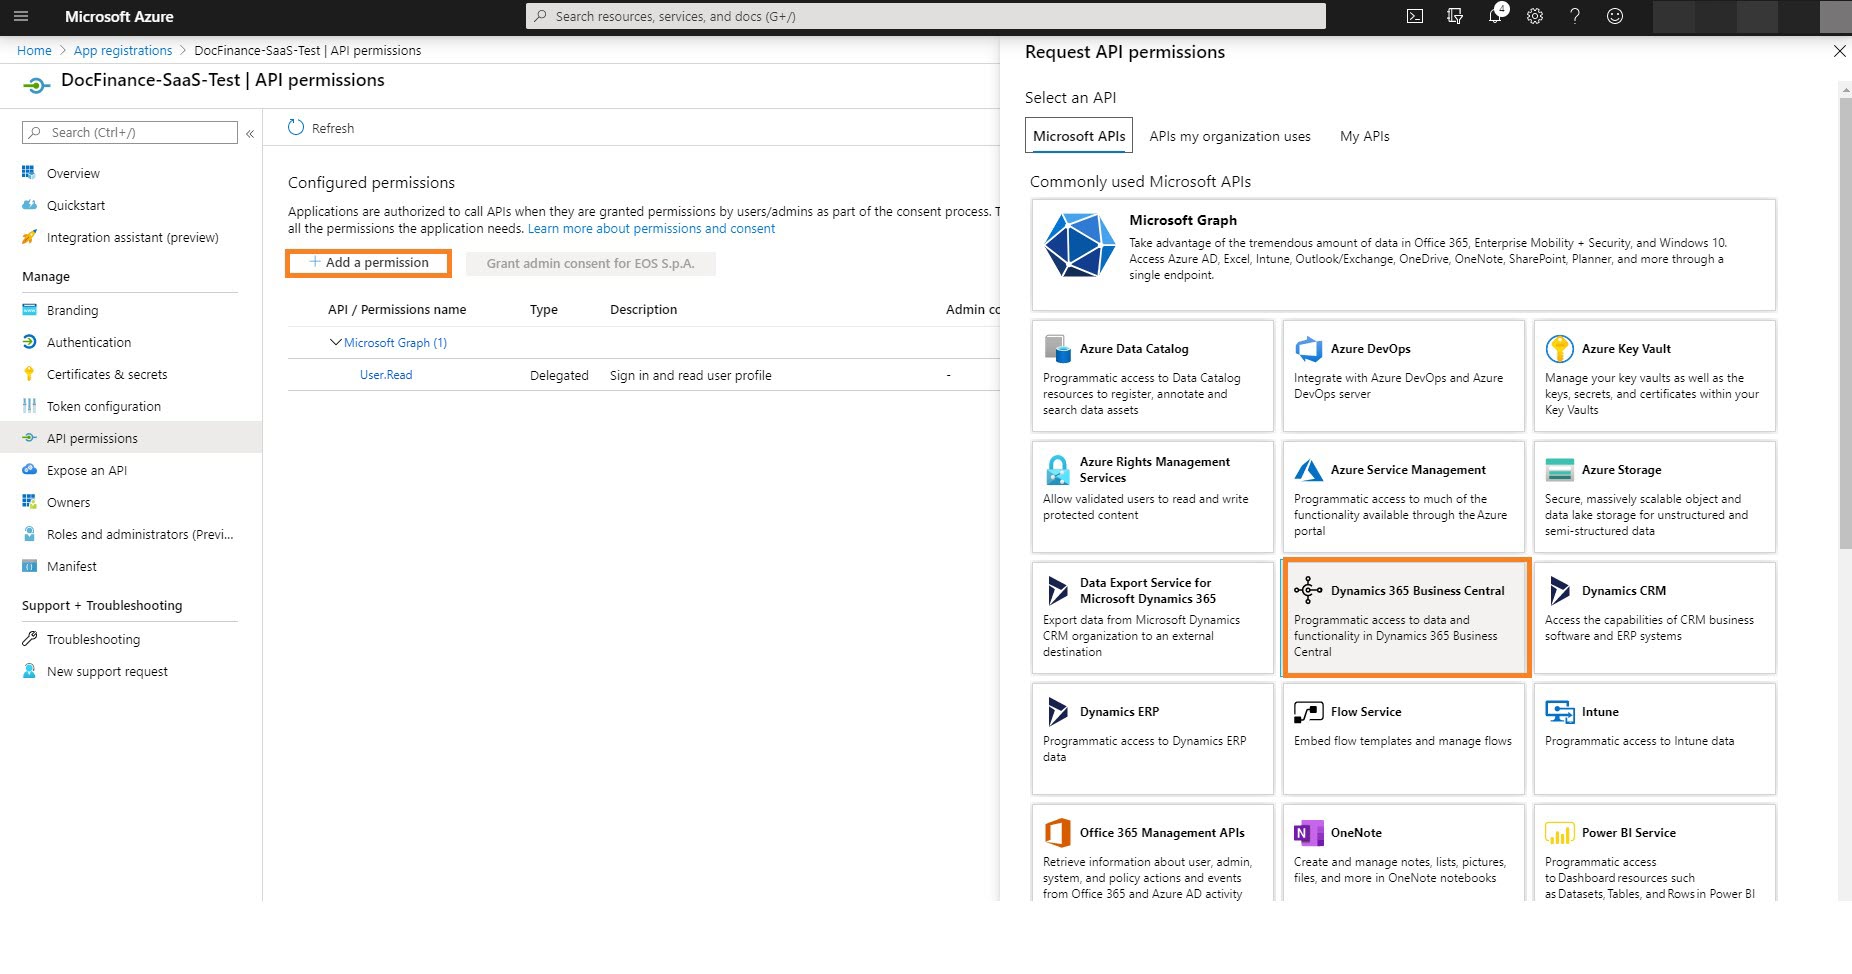
8. On the next page select “Application permission” and choose“App_access”. Complete the action by pressing “app_access”
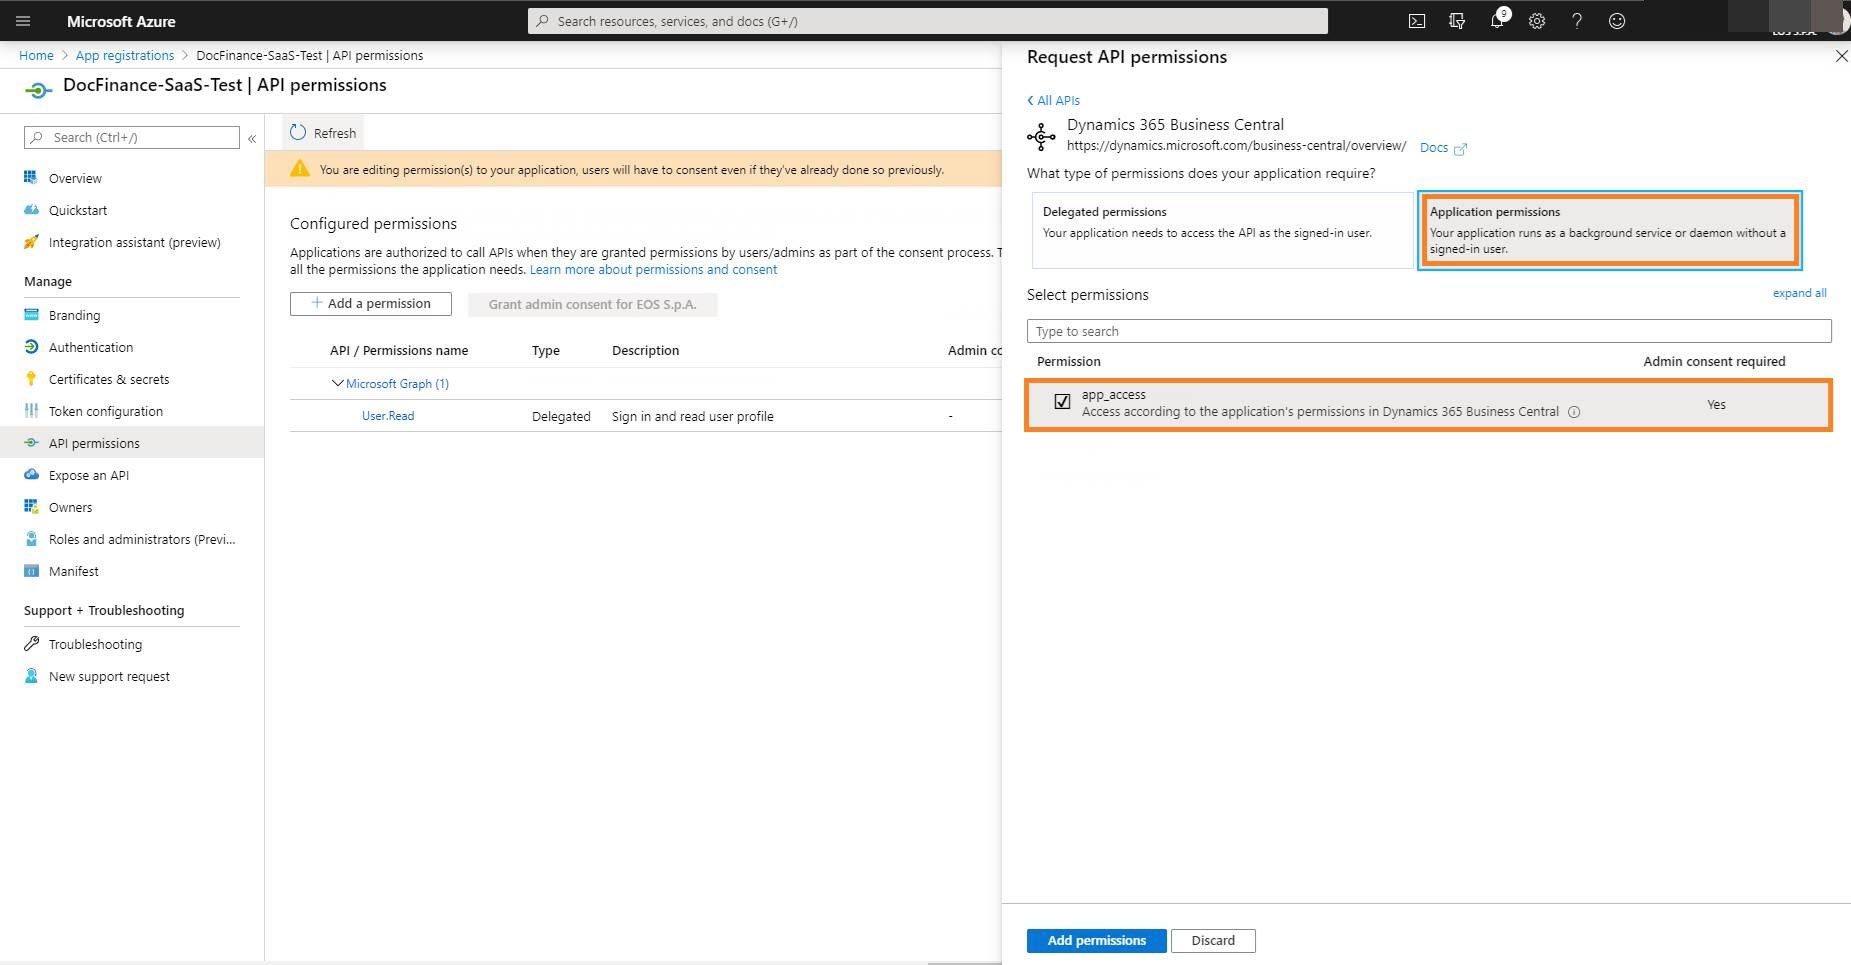
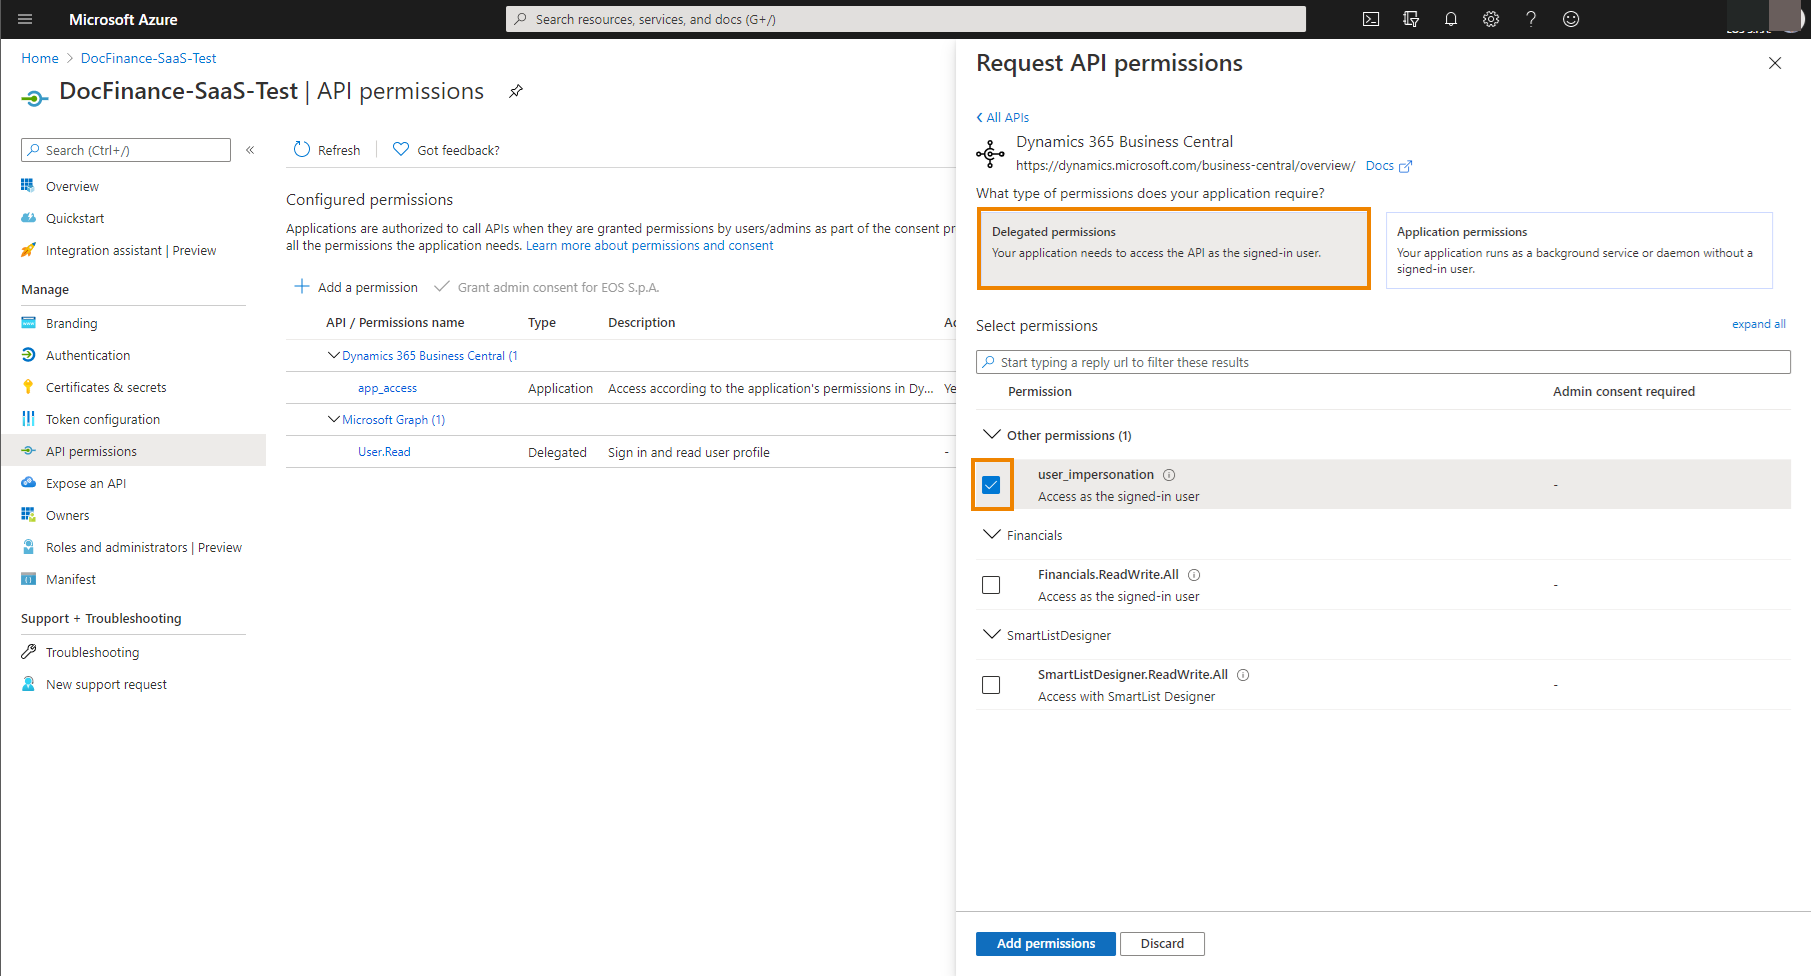
9. Select “Add a permission” and then “Dynamics 365 Business Central”

10. Then click “Delegated permissions” and “user_impersonation” and press Add permissions.
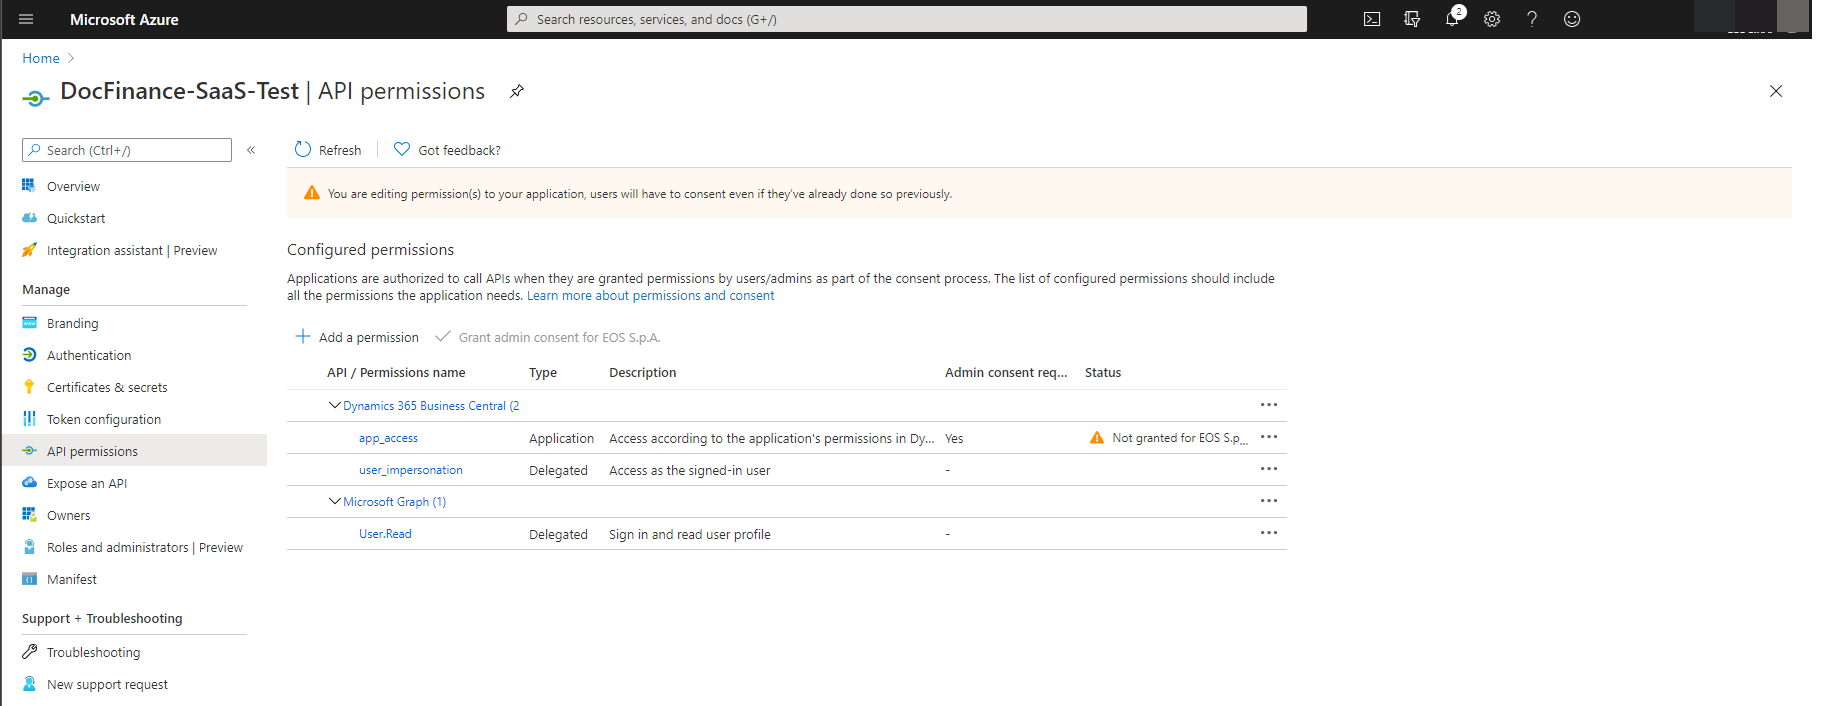
11. The page will appear this way:
On the page “Overview”, you can see the client ID :


|
Tenant ID |
ID of the tenant you are working on |
|
Environment Name |
name of the environment |
|
API publisher/group/version |
string used to compose the URL to be called (in case of change in the future, the new URL can be easily obtained) |
| Company ID | company ID on BC, can also be retrieved by zooming in on the list of companies |
Then you can enter the information in the setup to BC
| Introduction |
| Base Setup |
| DocFinance Setup (DCF) |
| Import Batches (DCF) |


