Quick guide
- Set up templates with list of tables and fields
- Create change/delete request
- Apply the new values
Introduction
The Eos Solution Posted Data Administration Tool app was created to modify data on any table of Dynamics 365 Business Central. Data modification can be applied on single record or massively on selected records .
The target user of this application is a professional consultant with the appropriate knowledge and skills about the underlying data model.
The app is not intended for use by users with basic and intermediate Business Central skills.
Protection of modified data
-
The app was designed to ensure tracking of changes made to the system by administrators.
-
Change tracking has the primary purpose of investigating and debugging in the event of "direct" changes to the data
-
The tracking of changes to the recorded data complies with the legal indications on privacy and data access by administrators
-
Change tracking offers (in most cases) the possibility of the recovery of data that has been changed / deleted by mistake. Read Limitation chapter below
Data recovery and Limitation
Data tracking does not guarantee the restoration of the same data in 100% of cases, for example:
-
Deleting a Document (NR1) and attempting to restore it after Document NR1 has been re-entered into the system
-
Recovery of images (Mediaset fields) or other data in binary format is not supported
System flexibility
-
The app was created with the aim of having sufficient flexibility to be used on DBs with different locations and different apps installed (Vertical Ref.).
-
The app provides for some data protection mechanisms, which in any case are subject to the principle of business logic violation
Posted Data Administration - SUMMARY
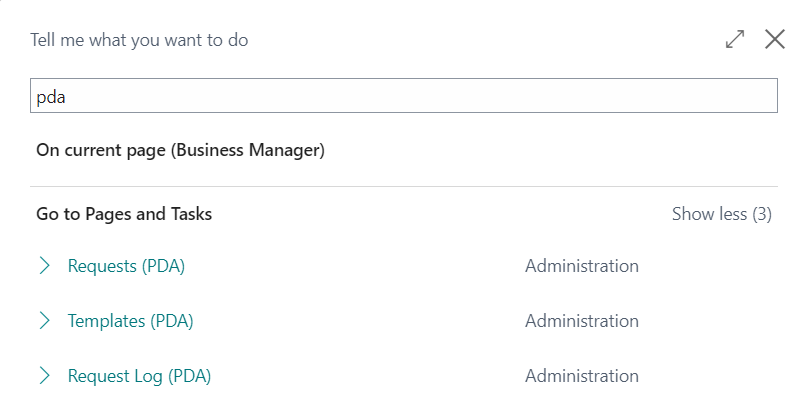
Press ALT + Q and digit "PDA" for a list of the features involved:
PDA Template
In the Template page (PDA), templates must first be set with the list of tables and fields on which it will be necessary to filter:
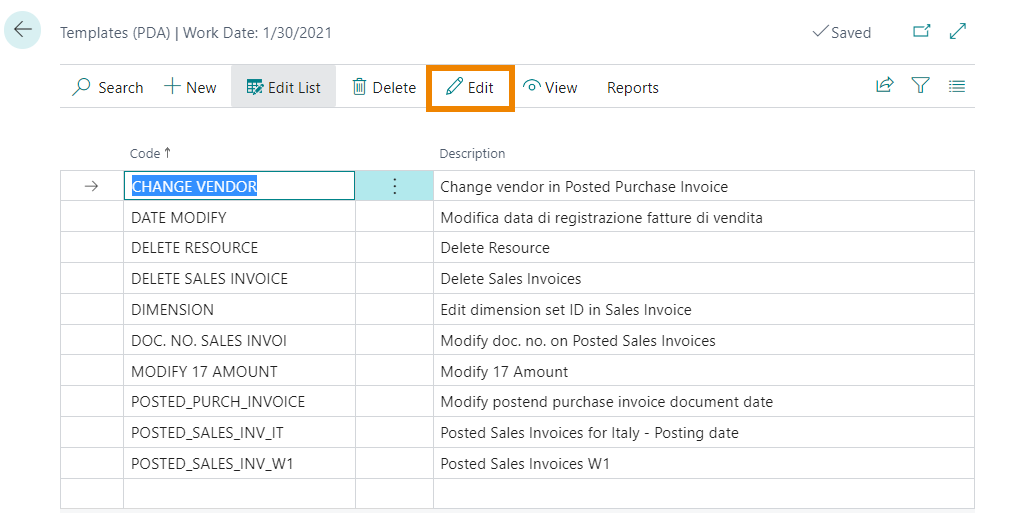
By selecting a template, from Edit it is possible to define the tables that you want to edit and the related fields:
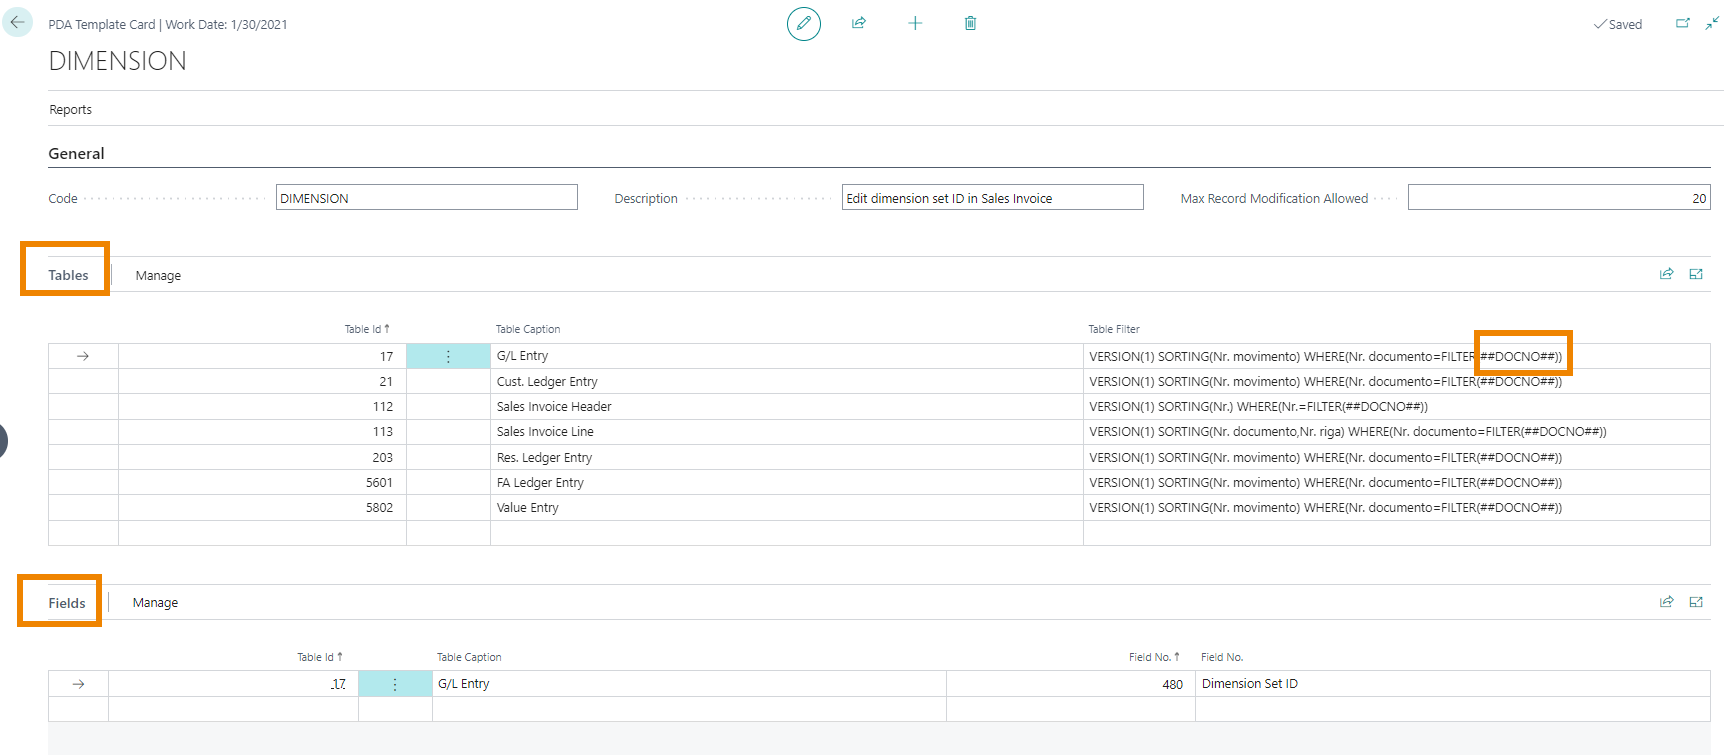
For each table it is possible to define the filter to apply. It is advisable to set the data to be filtered between two #s, so that the system can recognize them and replace them automatically for each new request.
Custom Controls
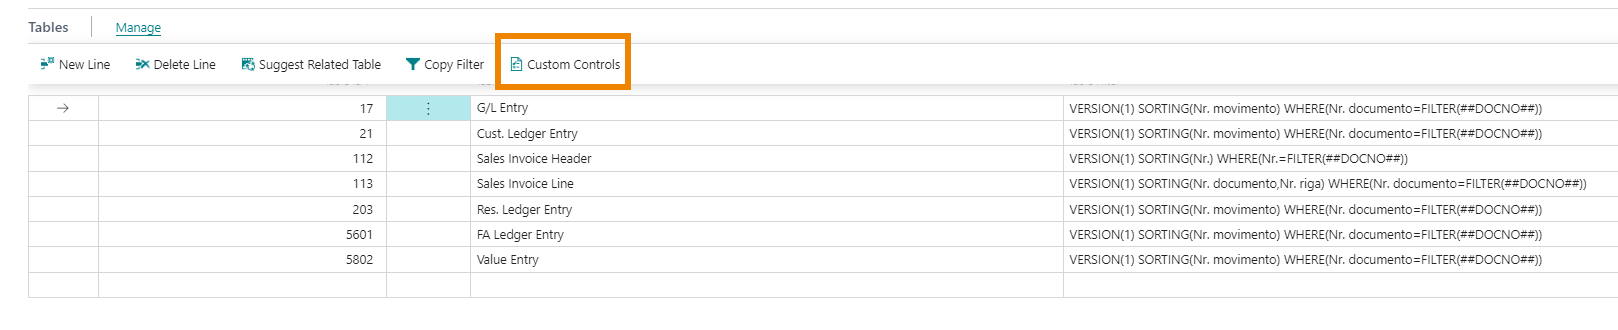
From Manage->Custom Controls you can open the page where you can select the CU of interest.
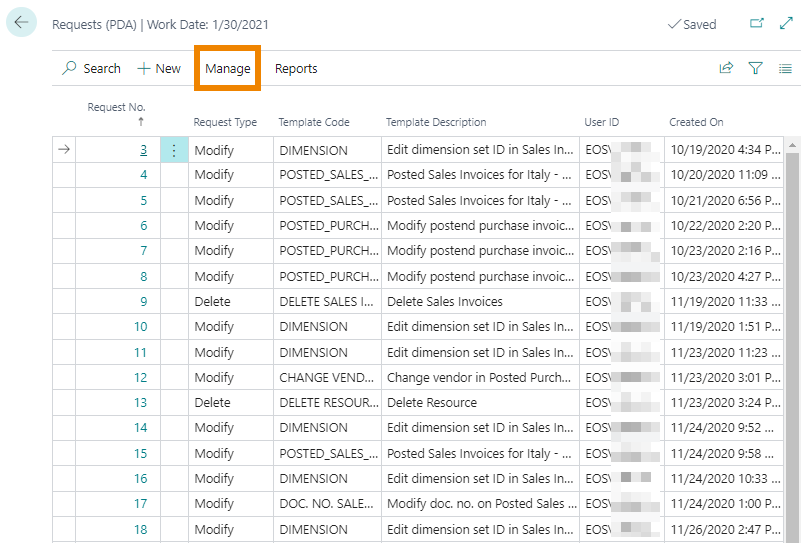
PDA Requests
After setting up the templates, you can proceed with the single request from the Requests page (PDA), by pressing NEW:
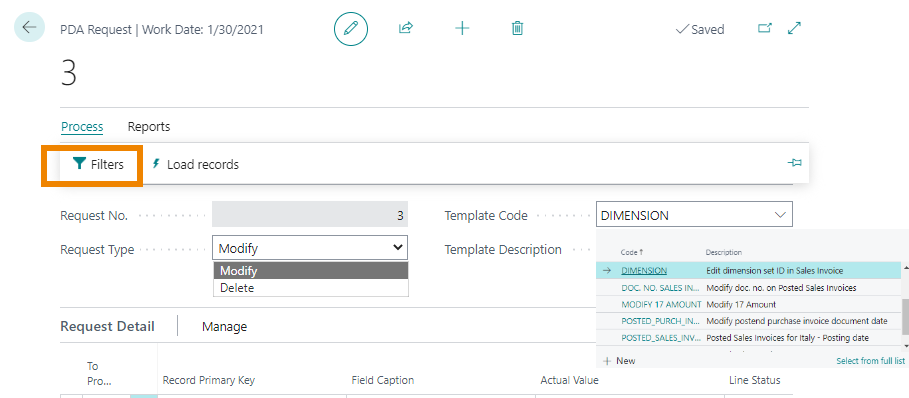
| Field | Description |
| Request Type | choose whether to make a request for Modification or for Deletion |
| Template Code | enter the template code you want to use |
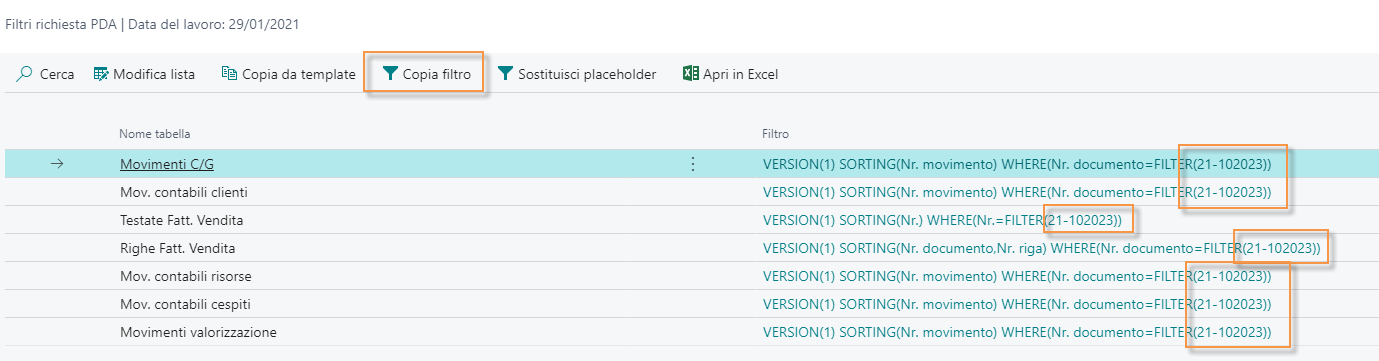
With Filters the system shows the list of tables and lets you select the filters.

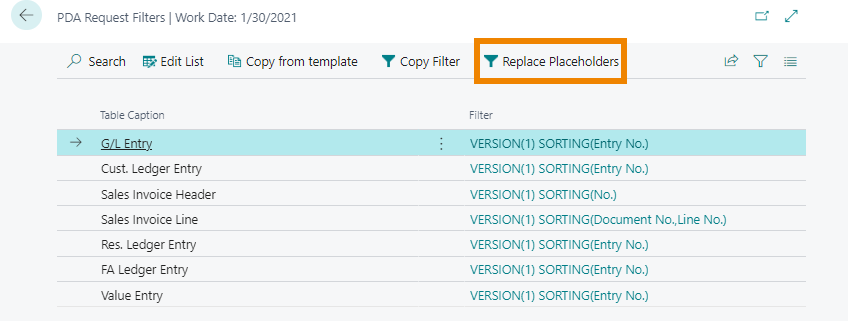
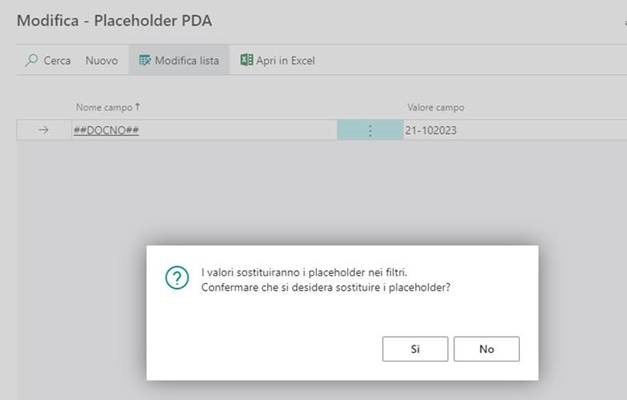
Filters can be imported directly from the template using the "Copy from template" function.
Once the filters have been imported, by clicking on "Replace placeholders" it is possible to massively replace all the values between the 2 #
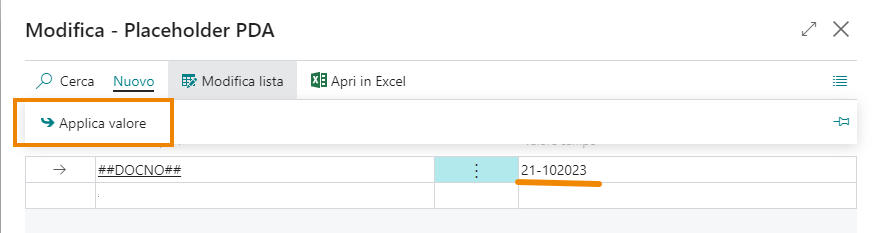
Then enter the document number you want to change.
Using the New->Apply value function, the system carries out the replacement:
And now
Note |
|---|
|
Using the "Copy filter" button, it is possible to copy the filter from the first line to all the other lines that have a field No. (but they must be empty). |
Once the filters have been defined, launch the "Load record" function:
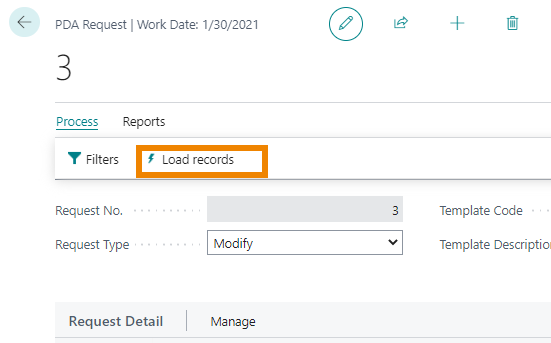
The system creates a line for each transaction based on the pre-set tables / filters.
For each line it shows the currently present value and it is possible to select the new value for each one:
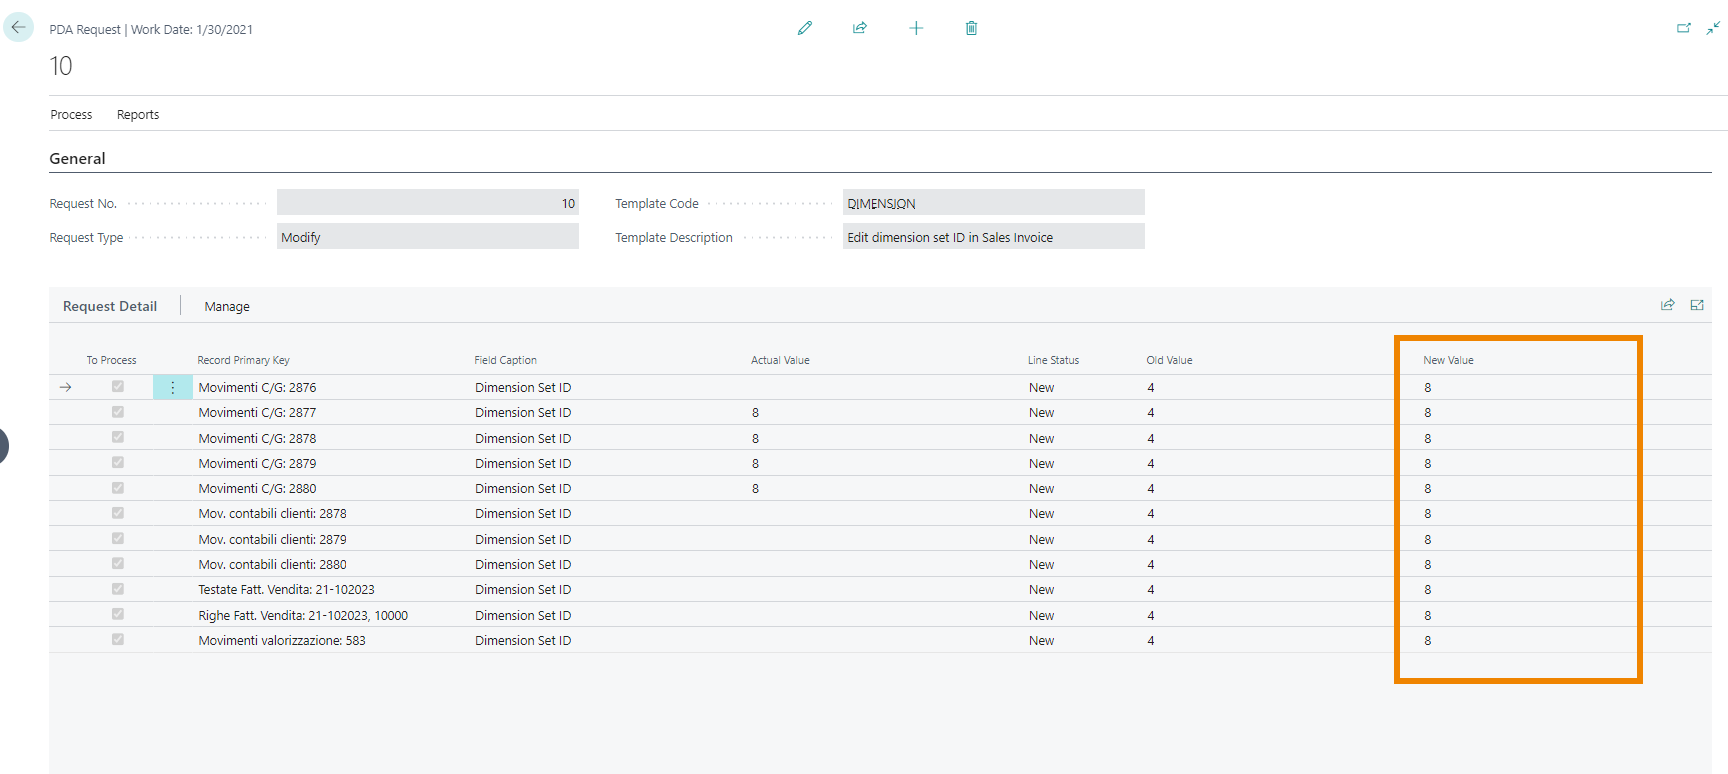
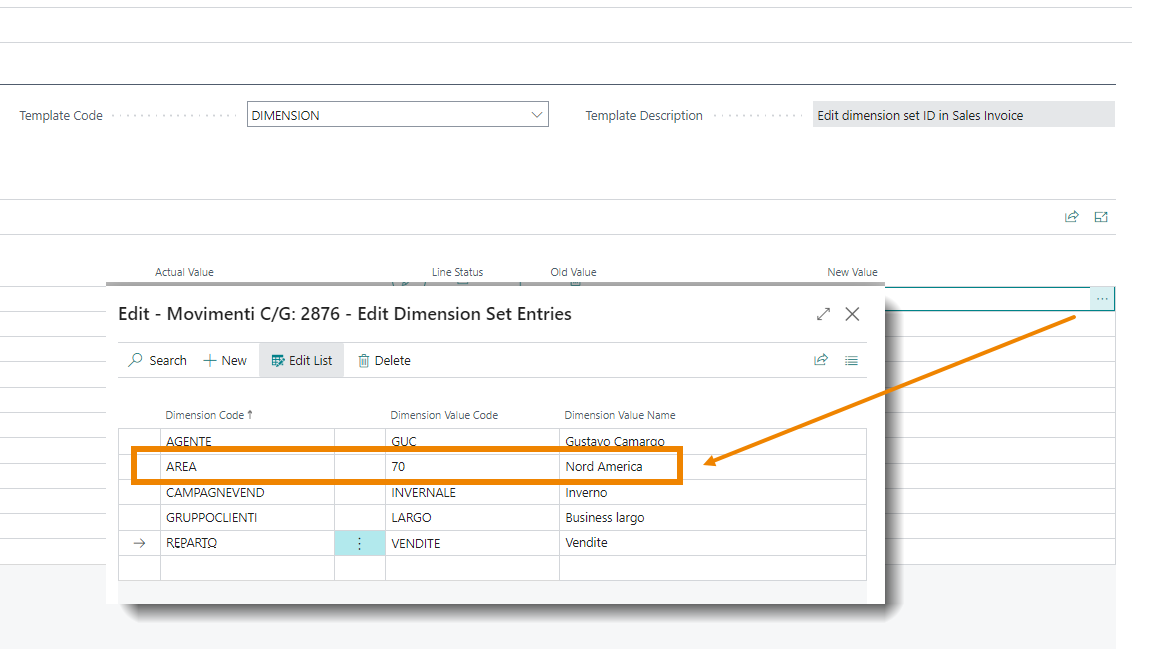
In the case of dimensions it is possible to use the 3 dots on the "New value" field to select the new desired Set ID dimension:
Note |
|---|
|
The 3 dots work with dimensions, tables and options. |
If you don't want to set the same new value to all lines, you can use the "Propagate value" function:
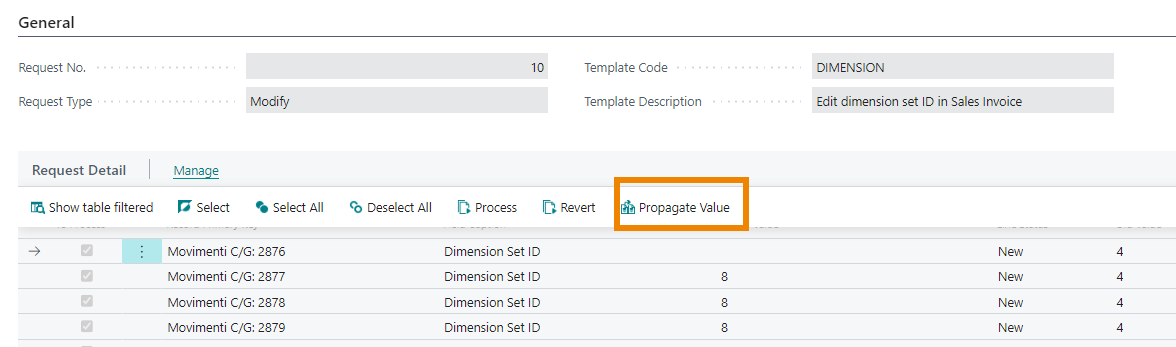
At this point the new value will be set to all existing lines.
Then select the lines you want to change (for convenience you can use the "Select all" function):
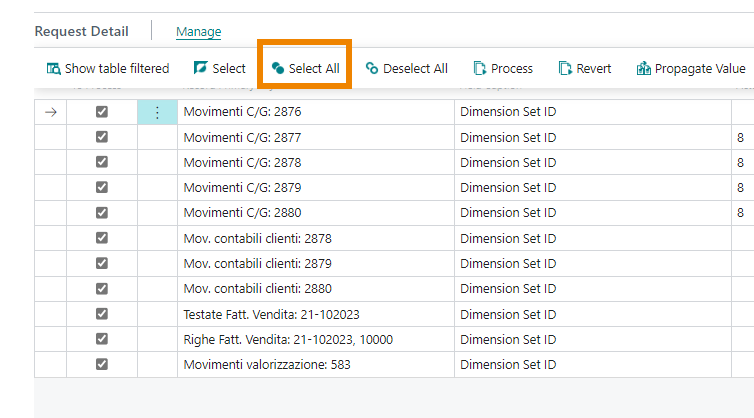
Click on Manage->Process to make the change by entering the new value:

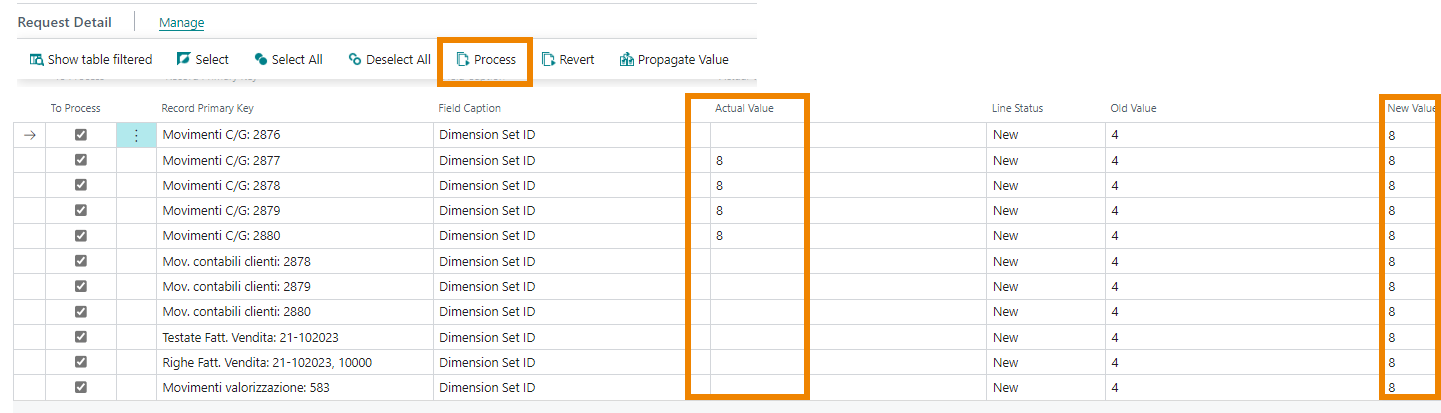
The "Old Value" remains as historical data.
Note |
|---|
|
Placeholder and filters The managed placeholders are: • ## String of your choice ## for fields of type text and queues • 01/01/1900 for date fields • 1234 for whole fields • 1.234 for decimal fields To filter a date field to show only records where the field is empty, double single quotes ('') must be used. |
Opening the Request Log page we see that each change is documented thanks to a log:

Cancellation Requests
On the request card, select Request Type=Delete
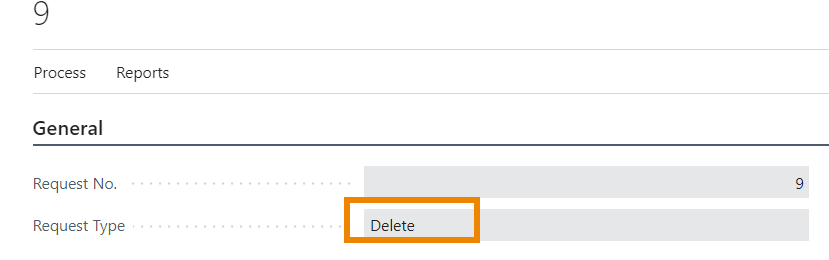
The steps for creating the lines are the same as previously described.
In this case it is not possible to select a new value on the lines:
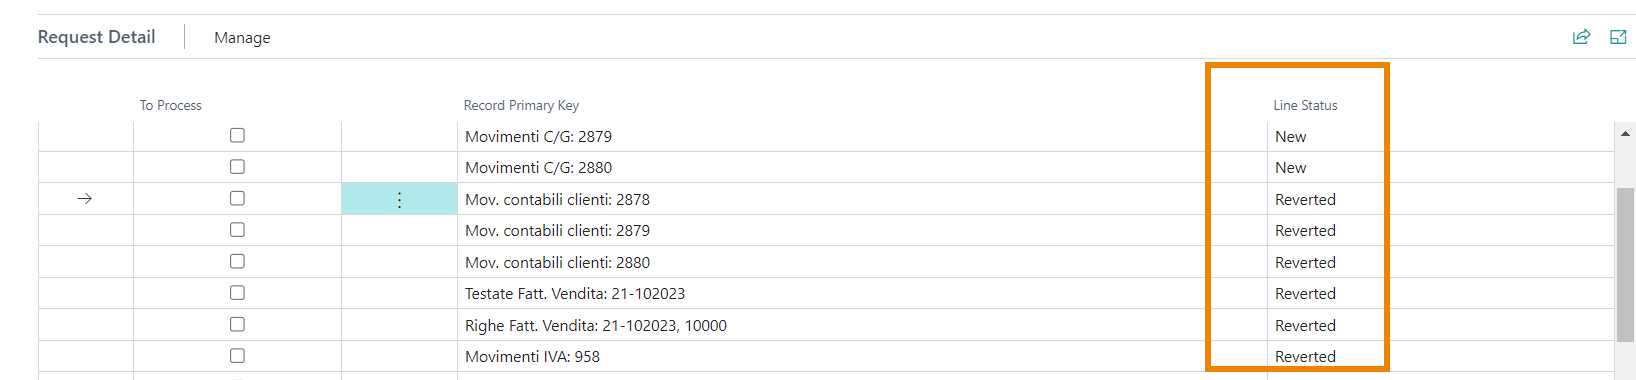
| List of possible states |
| New |
| Executed (Deleted) |
| Reverted |
Specifications |
|---|
|
The log table saves the json of the deleted record as a BLOB, therefore it is possible to go back in case of deletion, in case of modification only the old value of the field is saved, therefore in case of restoration, only that field will be restored and not any others fields changed. It is possible to delete and restore several times, each time a log line will be created with the latest version data: - Deletion -> the entire record - Modify-> the modified value Few data is lost (Media, MediaSet and Binary. Blobs work) |