Quick guide
- fill-in the Compensation Setup
- in Compensation page start from a Customer or a Vendor
- post or reset Compensation and select the accounting items again
Subscription |
|---|
|
Some features of Customer Vendor Compensation app require a subscription. The subscription can be activated from Subscription control panel or directly from the notification messages that the system proposes, by clicking on the link that allows you to start the subscription wizard. In particular:
See Eos Solutions website for more information. |
The Customer Vendor Compensation App for Microsoft Dynamics 365 Business Central allows you to select lines from two lists of accounting items to compensate. For example, if you select select a Customer invoice which total is 100 € and a Vendor invoice which total is 80 €, it will be suggested the entry to connect the two accounting items: the Vendor invoice will be 0 € and the Customer invoice will now be open for 20 €. Precondition: Customers and Vendors can be connected by different options:
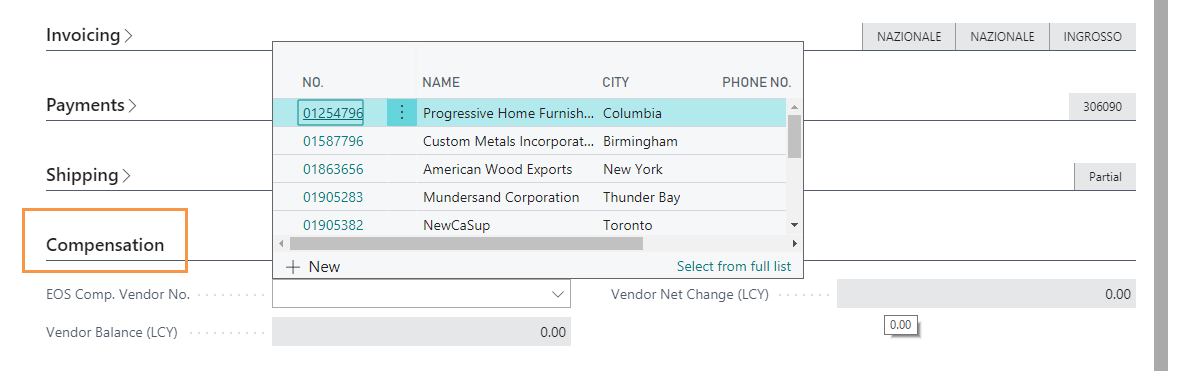
- in the Customer / Vendor card (Compensation->EOS Comp. Vendor No.)
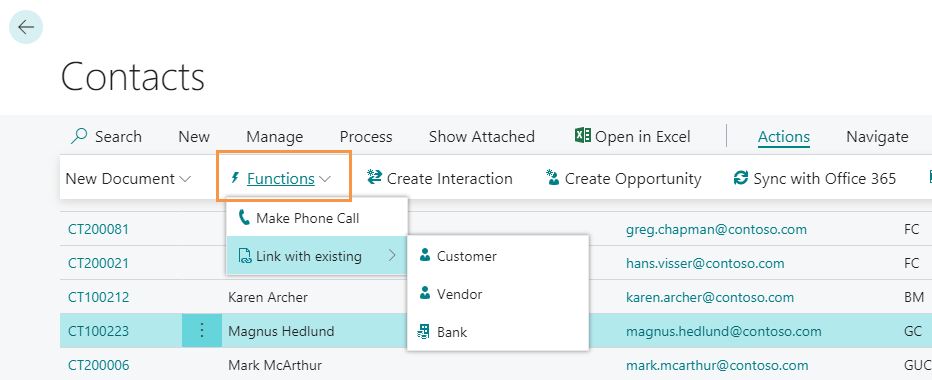
-in Contacts (from Functions->Link with existing)
-they share the same VAT Number
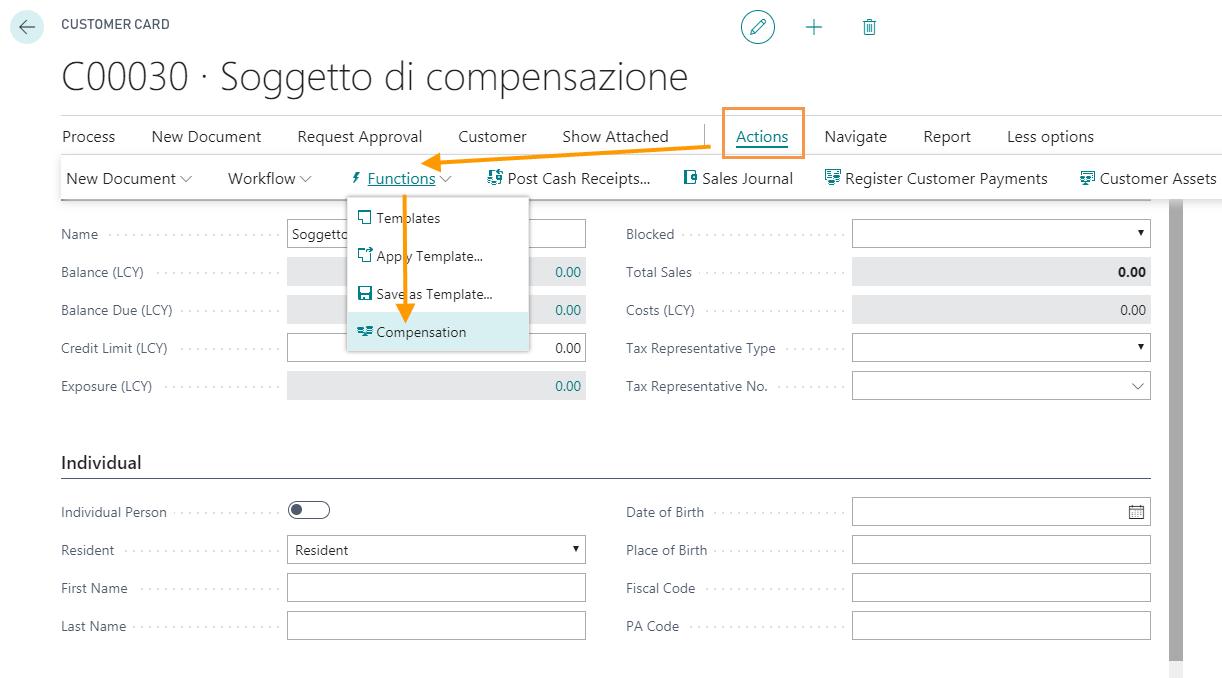
Compensation
In the Customer / Vendor card go to Actions->Functions->Compensation:
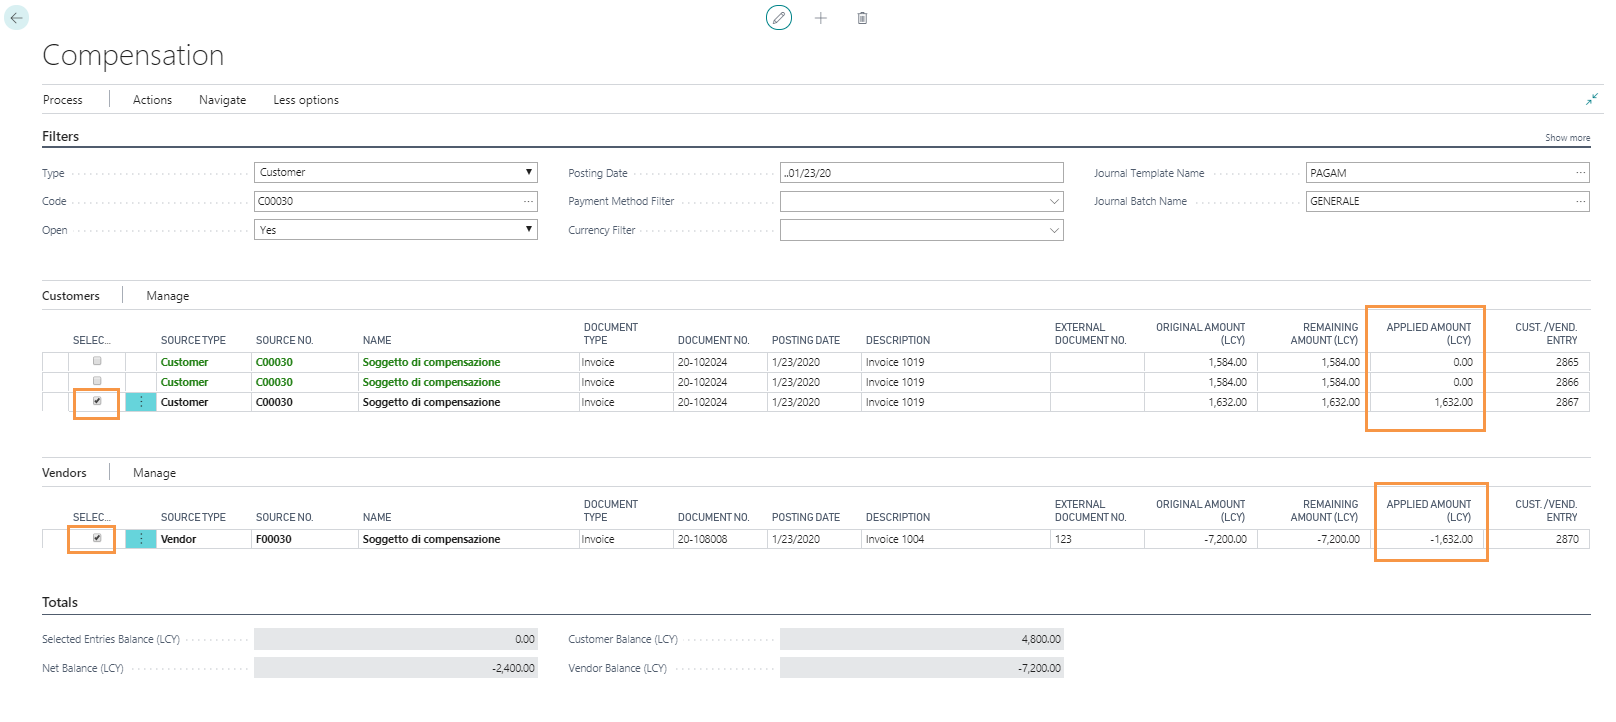
the system will propose the connected entries depending on the filters selected:
|
Field |
Description |
|---|---|
| Open | choose if the system will show open / closed / all entries (Yes / No / All) |
| Posting Date | it is possible to filter by Posting Date |
| Payment Method Filter | it is possible to filter by Payment Method |
| Currency Filter | it is possible to filter by Currency |
| Journal Template Name | define a category for records concerning registration |
| Journal Batch Name | define a batch for records concerning registration |
Mode Entries / Linked entries
Go to Compensation->Auto-Comp. From and decide whether to start from a Customer or from a Vendor. The selected entries will be markd in the "Selected" coloumn.
|
|---|
| In Actions>Compensation-->Reset Compensation it is possible to reset and select the accounting items again |

In Actions->Suggest Compensation Lines you have access to the registration batch:
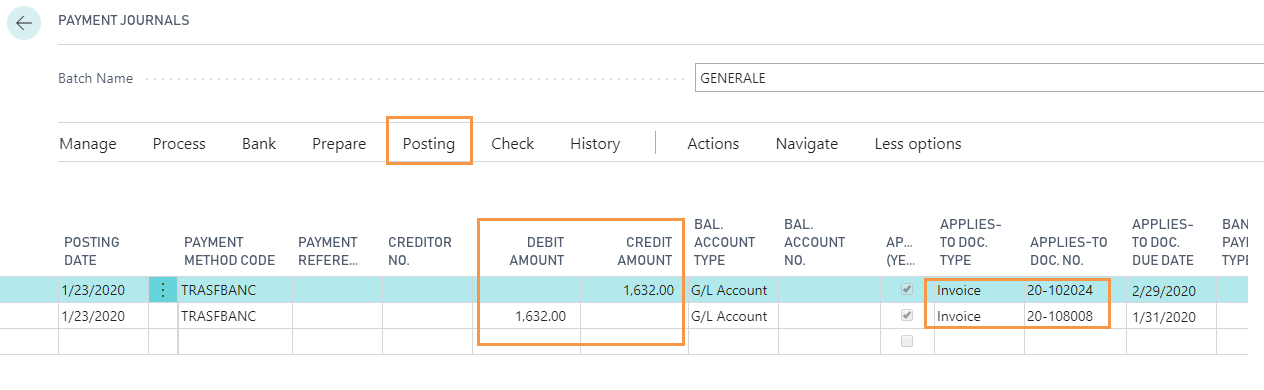
The system will propose the entries to balance. Posting the payment, the journal registers all the entries and connects them to the selected documents.
Mode On Balance
You select only entries of a section (Source), e.g. Customer and pressing "Suggest Compensation Lines" the system will propose only the lines of closure of selected invoices and will add a single record to the Vendor (Recipient) without connecting to any accounting item (you can make the connection manually later). This is achieved only when the balance of the Recipient does not become negative.
Semiautomatic compensation
You select only an entry of the Source, then you go to Actions, "Auto-Comp From" and choose Vendor Entry. The system will try to connect the entry selected to the lines of the Recipient section by FIFO. It can also be done in reverse, starting from a Vendor movement.
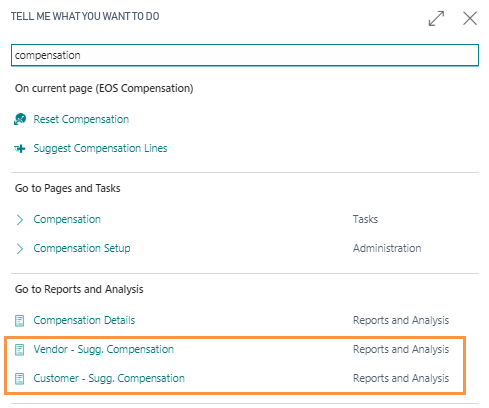
Massive Compensation Report
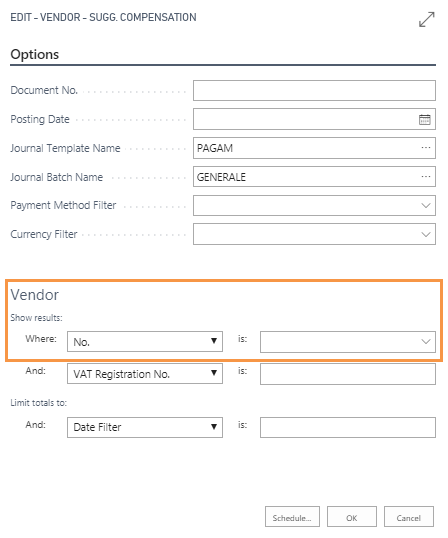
The massive compensation report exists for both Sales and Purchase:
It is possible to make the compensation for some filtered customers: the system will propose the entries to balance in the batch indicated in the setup.
Setup
In Setup Compensation define a category and a batch for records concerning compensation.