Quick guide
- Configure and enable new fields
- Edit lists containing values for the new fields
- Copy the new fields on Sales / Purchase Header
Custom Defined Fields
The Custom Defined Fields app allows you to enter over 30 customizable fields in different cards, without involving a programmer and without a development license (Business Central OnPremise version). It's possible to:
-
activate the custom fields in a few seconds using the different types of data managed: dates, numbers, codes, etc.
-
link the fields to a table for data validation
-
select any existing table (e.g. Articles categories or Country codes ...) or define a new list of completely customized values / descriptions
-
automatically propagate the values of the custom fields of customers and vendors on sales and purchase documents, inheriting the activated options
To make the fields visible on the pages you can enable them from the appropriate setup by setting some simple options.
|
|---|
|
Field names can be customized and can be translated into multiple languages. |
The custom fields are avaliable for:
-
Customer
-
Vendor
-
Item
-
Sales header
-
Purchase header
-
Resource
-
Job
-
Employee
-
Fixed asset
-
Transfer header
-
Service header
Subscription |
|---|
|
Some features of the Custom Defined Fields app require a subscription.
The subscription can be activated from the Table Setup page by clicking on Actions-> Subscription or directly from the notification messages that the system proposes, by clicking on the link that allows you to start the subscription wizard. In particular:
See Eos Solutions website for more details. |
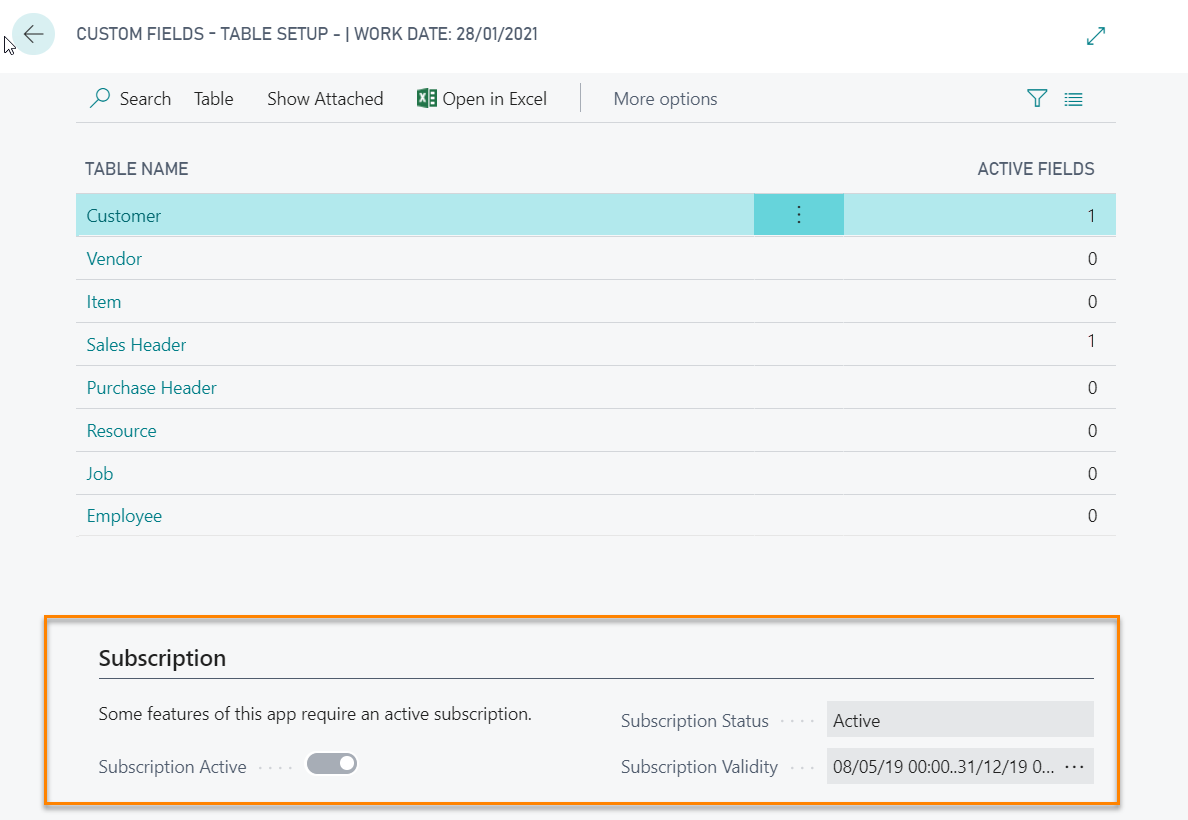
Table setup
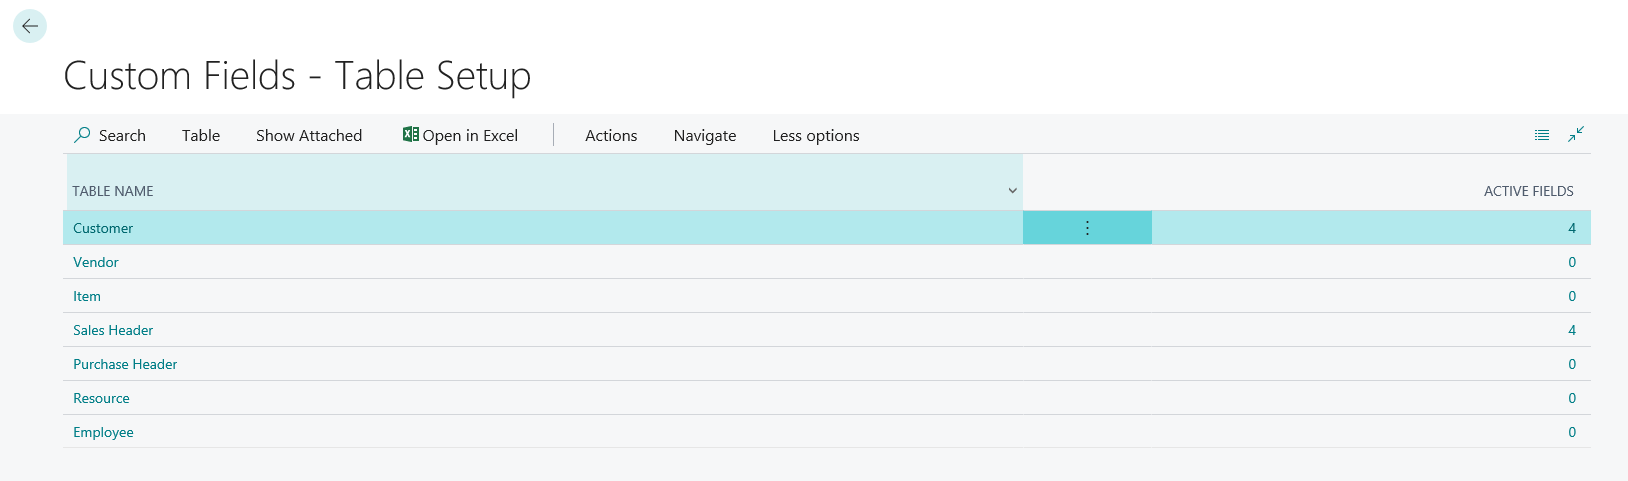
In Custom Fields - Table Setup you can see the tables involved:
|
|---|
|
The column "Active fields" indicates the number of fields for which a setup has already been set. |
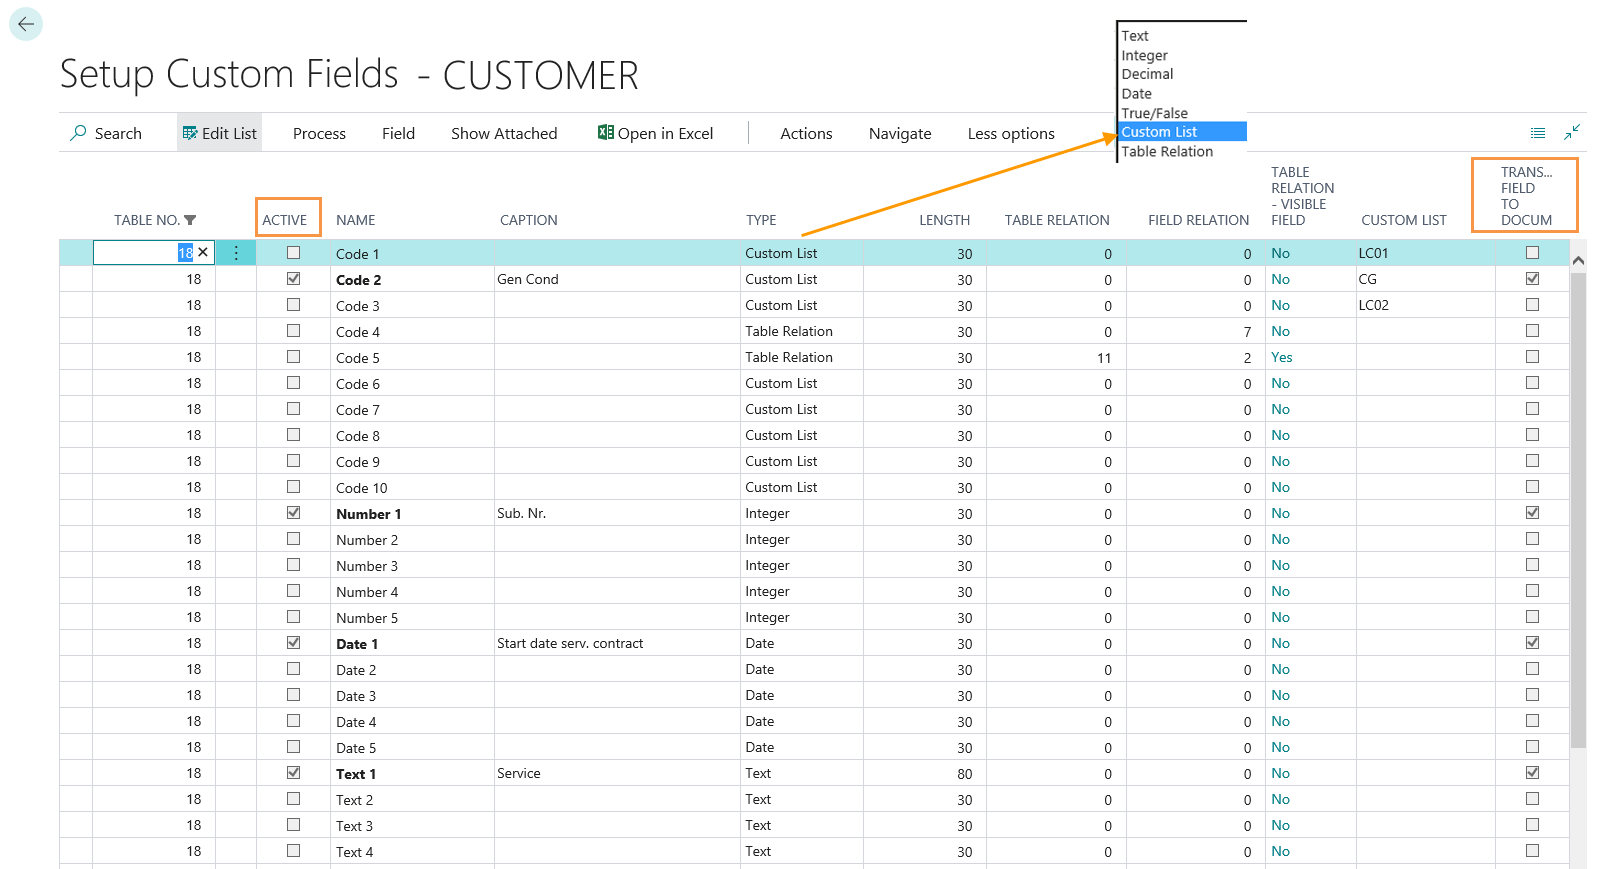
In Navigate-> Table-> User Defined Fields it is possible to define and enable the fields. Selecting "Edit List" the page is modifiable:
| Field | Description |
| Active |
Enable the setup line for the single field. The active fields are
displayed in bold.
To enable the line: Process-> Activate or Actions-> Activation-> Activate. You can select multiple lines and activate them all together. N.B. To enable a Code field it is necessary to specify a Custom list: 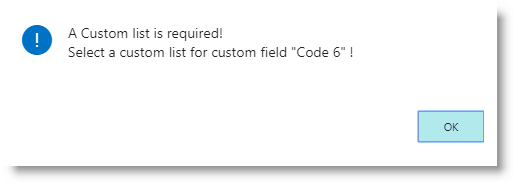 |
| Name | Name indicating the field TYPE (Code, Number, Date, Text, etc.). It is not editable. It will never appear on the page unless no label has been indicated for the active field. |
| Caption | Label that defines the name of the field that will appear on the page |
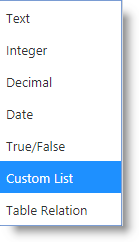
| Type |
Type of field. The options are:
|
| Lenght | Length referred to Text fields (in other lines a default length of 30 is set) |
| Table relation |
If the "TABLE RELATION" type has been chosen, indicate the number of
the Table to which the field should be related: |
| Field relation |
The relationship with the visible field must be defined for each table relationship:  In addition, from Field->Table Relation-Visible Fields choose which individual fields to enable the relationship. |
| Table Relation - Visible Field |
The options are:
|
| Custom list |
If the "CUSTOM
LIST" type has been chosen, indicate the list to which the field should be related: |
| Transfer field to to documents |
By ticking the option, the changes will be shown on the
Sales/Purchase Header.
In the Sales/Purchase Header the copied fields will appear in light blue: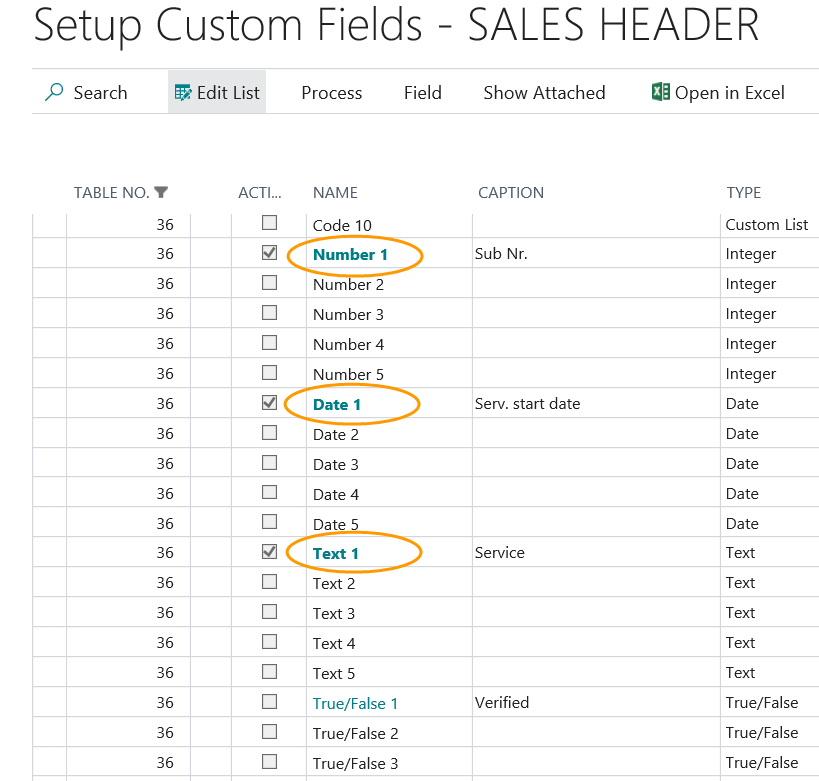 |
From Field-> Fields Translation you can define the translations.
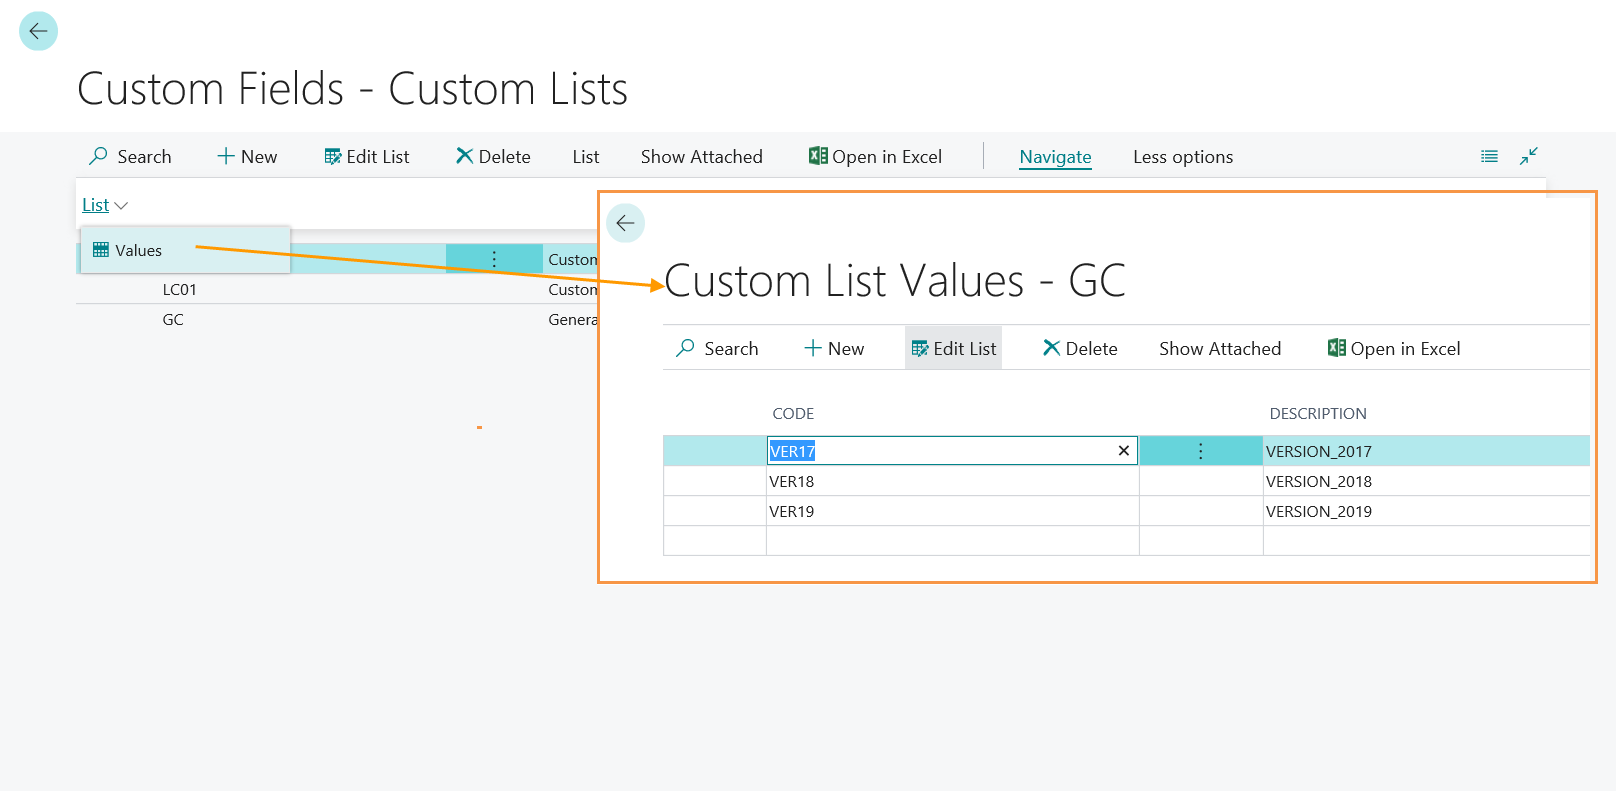
List Setup
In Custom Fields - Custom lists you can define the lists that can be used in the Code fields and than assign values.
For each new list it is necessary to set a code and a description. Then go to Navigate-> List-> Values:
Custom Fields Tab
Once configured and activated, the fields are shown in the Custom fields Tab of the selected pages. Example:
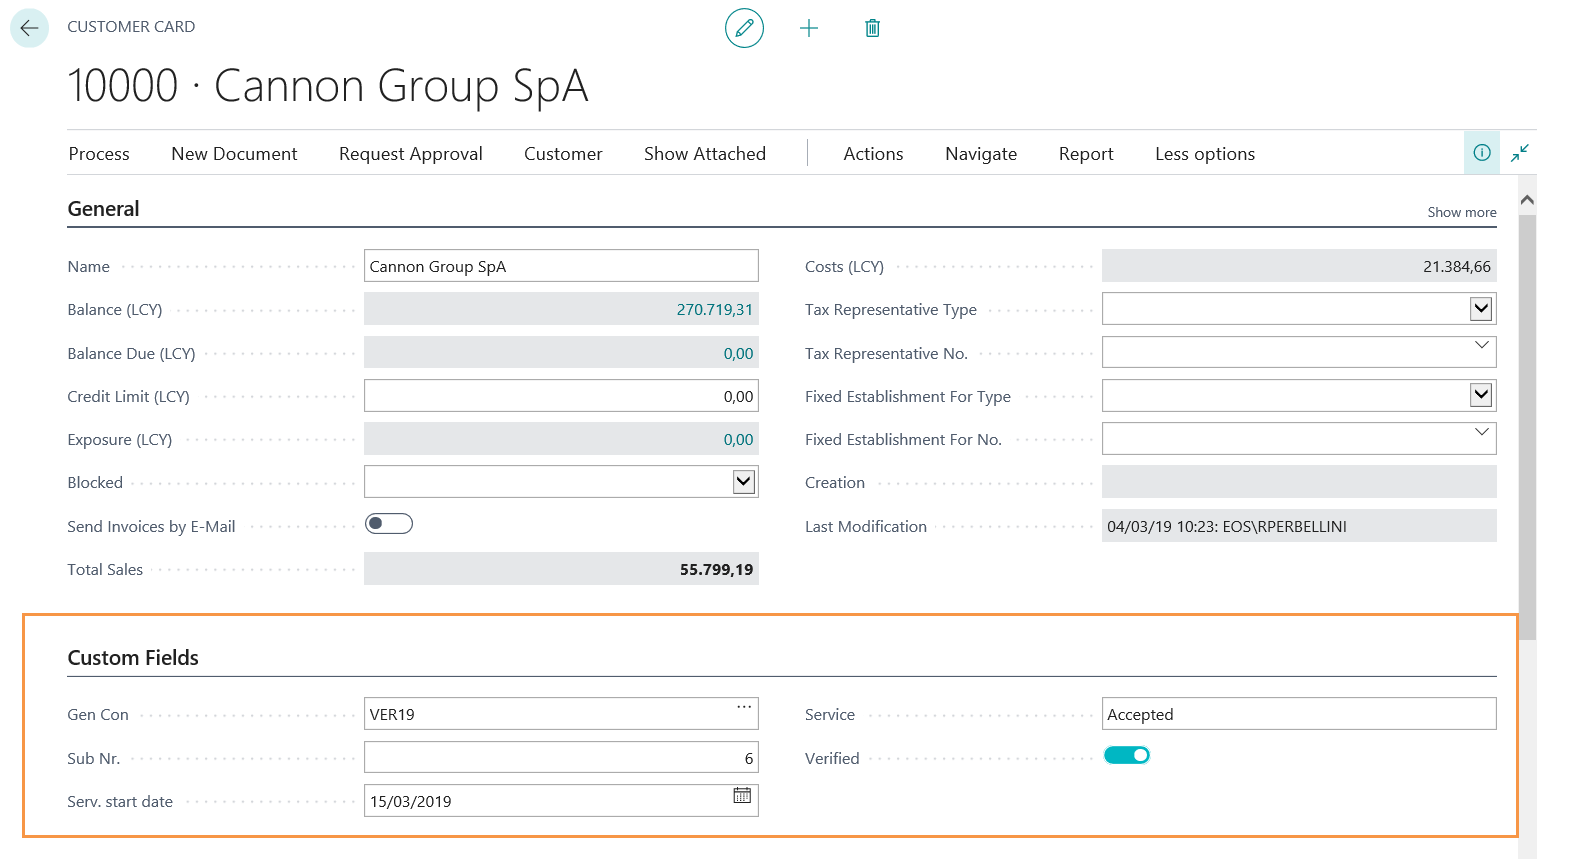
|
|---|
|
During the posting the Custom Fields Tab of the order will be transferred to the invoice. |